使用 TiUP 部署 TiDB 集群
环境准备
由于机器资源限制,在个人笔记本进行测试,笔记本配置为MacBook Pro(2015,4c16g)下
使用parallels新建了四个虚拟机,1台中控机器,3台目标机器,安装的操作系统版本都为centos7
中控机器分配的资源为1c2g,最大64g的硬盘空间,ip为192.168.199.226
目标机器每台分配的资源为2c4g,最大64g的硬盘空间,ip地址分别为192.168.199.227、192.168.199.228、192.168.199.229
| 192.168.199.227 |
pd,tikv,tidb |
| 192.168.199.228 |
pd,tikv |
| 192.168.199.229 |
pd,tikv |
手动配置 SSH 互信及 sudo 免密码
1
2
3
4
5
6
7
8
9
10
11
12
13
14
| ## 使用root登录每台机器,创建tidb用户,并设置密码
useradd tidb && passwd tidb
## 执行以下命令,将 tidb ALL=(ALL) NOPASSWD: ALL 添加到文件末尾,即配置好 sudo 免密码。
visudo
tidb ALL=(ALL) NOPASSWD: ALL
## 以 tidb 用户登录到中控机,执行以下命令。按提示输入部署目标机器 tidb 用户密码,执行成功后即创建好 SSH 互信,其他机器同理。
ssh-keygen -t rsa -C "sdaulibin@126.com"
ssh-copy-id -i ~/.ssh/id_rsa.pub 192.168.199.227
ssh-copy-id -i ~/.ssh/id_rsa.pub 192.168.199.228
ssh-copy-id -i ~/.ssh/id_rsa.pub 192.168.199.229
## 以 tidb 用户登录中控机,通过 ssh 的方式登录目标机器 IP。如果不需要输入密码并登录成功,即表示 SSH 互信配置成功。
ssh 192.168.199.227
ssh 192.168.199.228
ssh 192.168.199.229
|
目标主机安装numactl
1
| sudo yum -y install numactl
|
中控、目标主机安装sshpass
1
2
| sudo yum install sshpass
sshpass -V
|
在中控机上安装 TiUP 组件
1
2
3
4
5
6
7
8
9
10
11
12
13
| ## 使用tidb用户
curl --proto '=https' --tlsv1.2 -sSf https://tiup-mirrors.pingcap.com/install.sh | sh
source .bash_profile
which tiup
## [tidb@binginx-centos ~]$ which tiup
## ~/.tiup/bin/tiup
tiup update --self && tiup update cluster
## download https://tiup-mirrors.pingcap.com/tiup-v1.0.9-linux-amd64.tar.gz 4.32 MiB / 4.32 MiB 100.00% 1.89 MiB p/s
## Updated successfully!
## component cluster version v1.0.9 is already installed
## Updated successfully!
tiup --binary cluster
## /home/tidb/.tiup/components/cluster/v1.0.9/tiup-cluster
|
编辑初始化配置文件
1
2
3
4
5
6
7
8
9
10
11
12
13
14
15
| git clone https://github.com/pingcap/tiup.git
cd tiup/examples/
cp topology.example.yaml topology.yaml
vim topology.yaml
## 主要修改机器的ip,使用最小拓扑架构,注释tispark、tiflash
## pd_servers:
## - host: 192.168.199.227
## - host: 192.168.199.228
## - host: 192.168.199.229
## tidb_servers:
## - host: 192.168.199.227
## tikv_servers:
## - host: 192.168.199.227
## - host: 192.168.199.228
## - host: 192.168.199.229
|
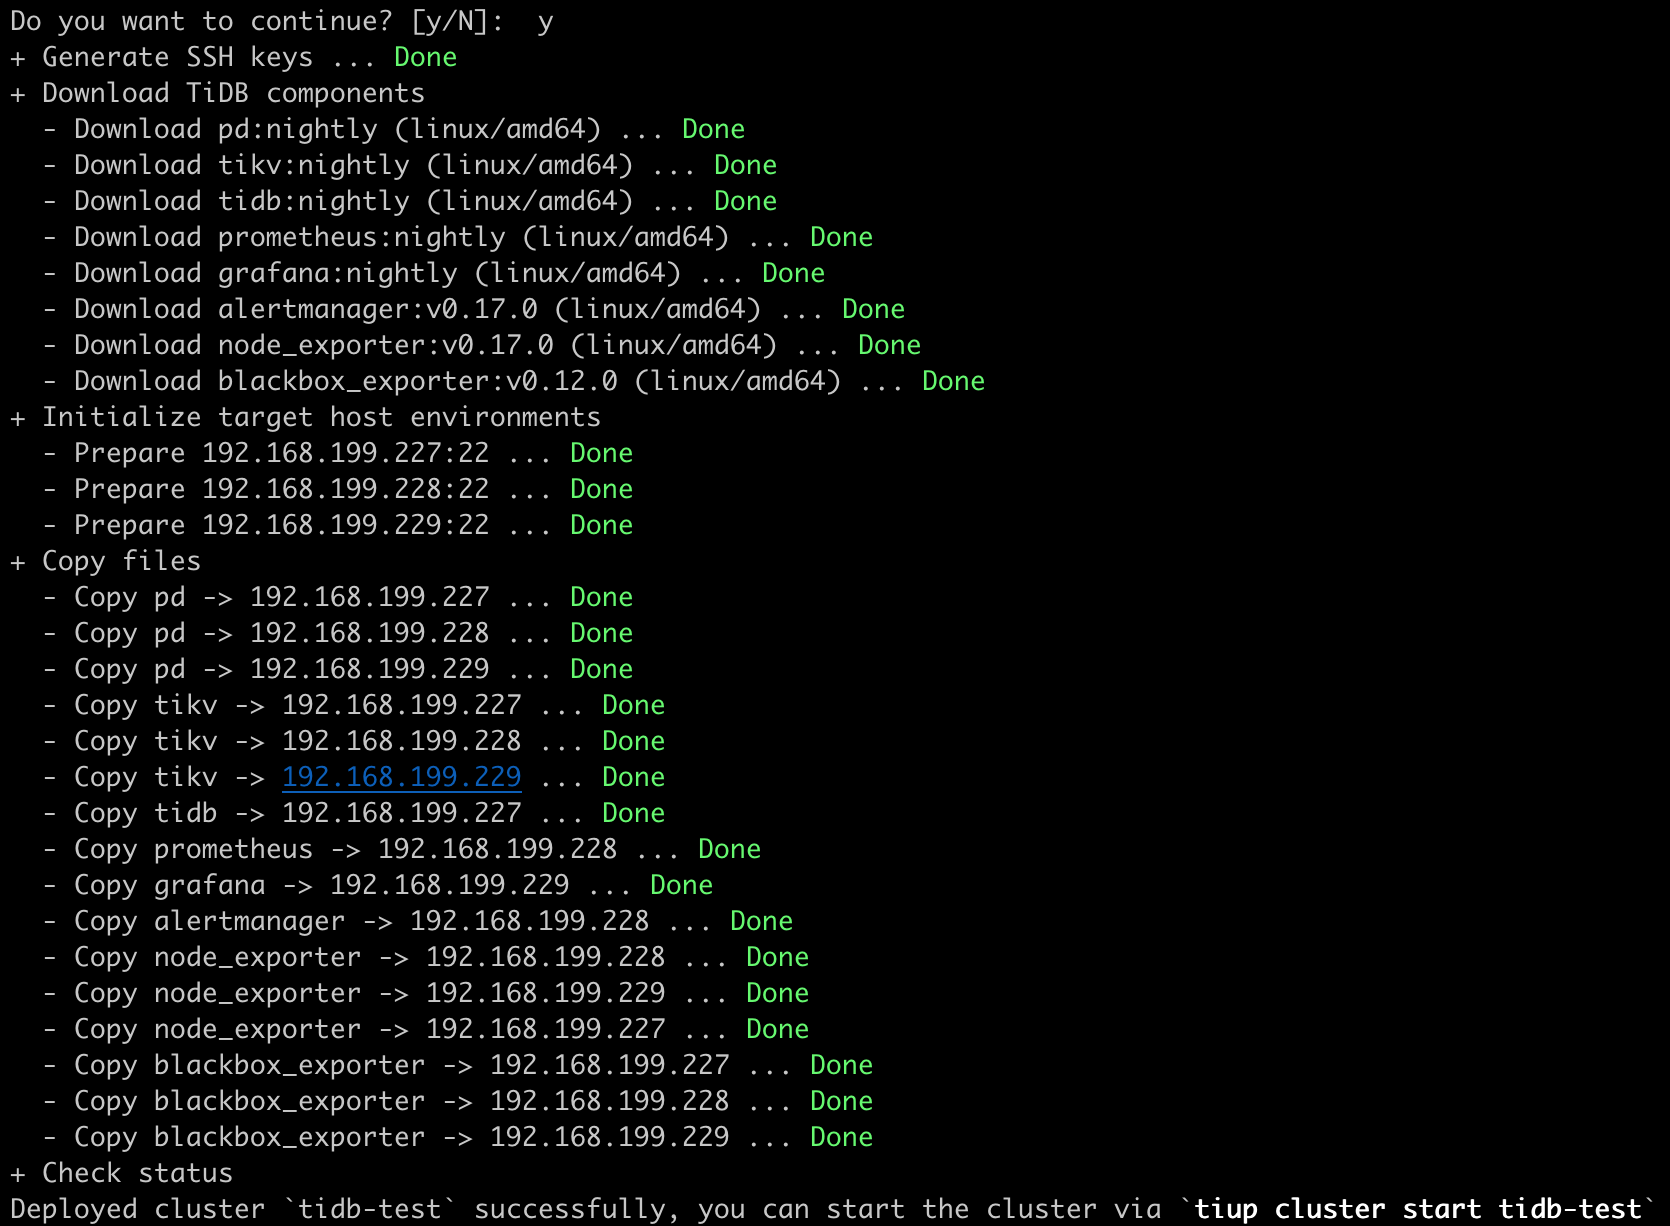
执行部署命令
1
2
| # 已设置免密和ssh互相信任,user为tidb
tiup cluster deploy tidb-test nightly ./topology.yaml --user tidb
|
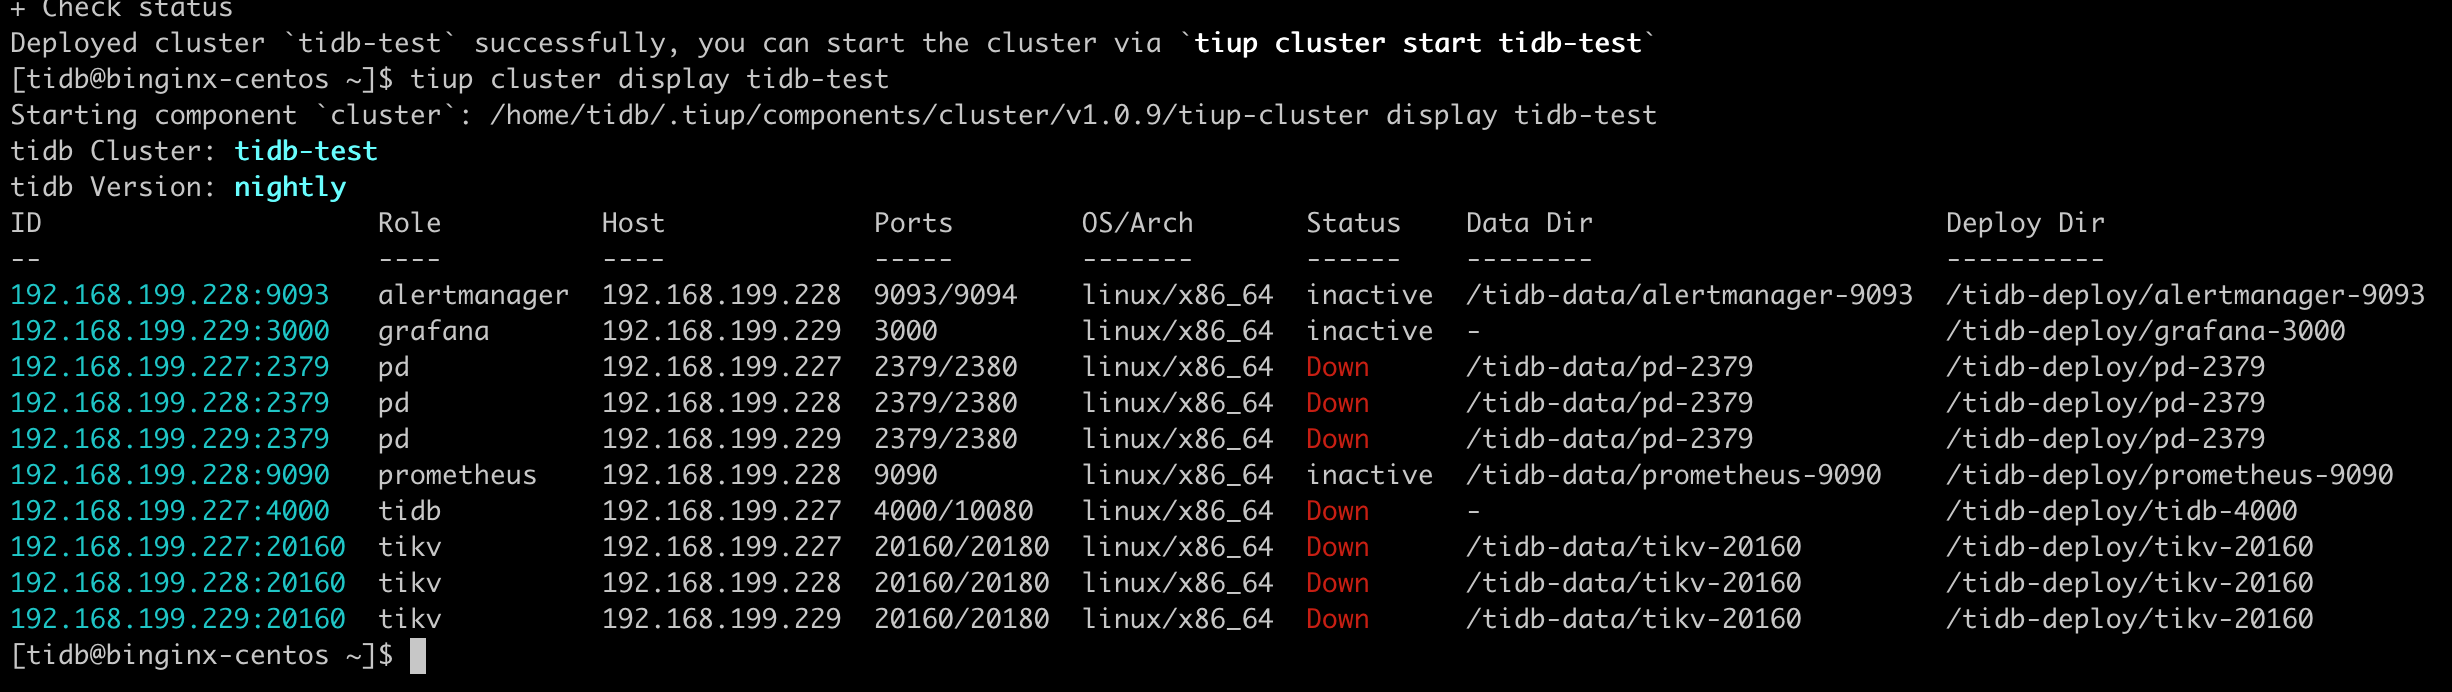
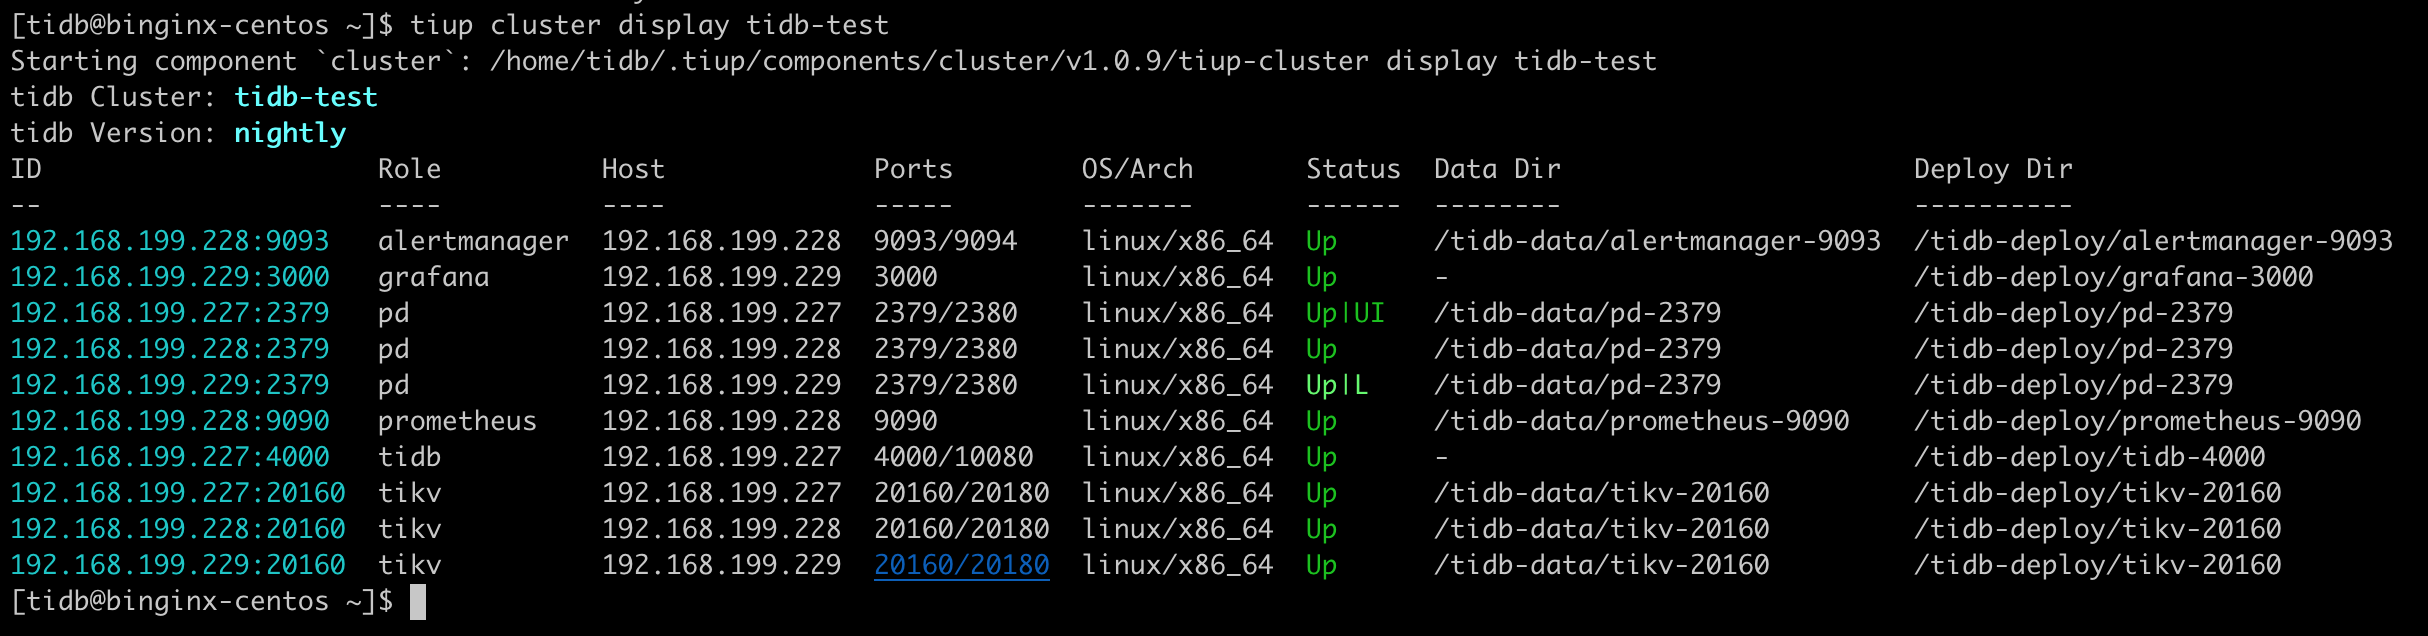
检查部署的 TiDB 集群情况
1
2
| tiup cluster display tidb-test
## 都为未启动状态
|
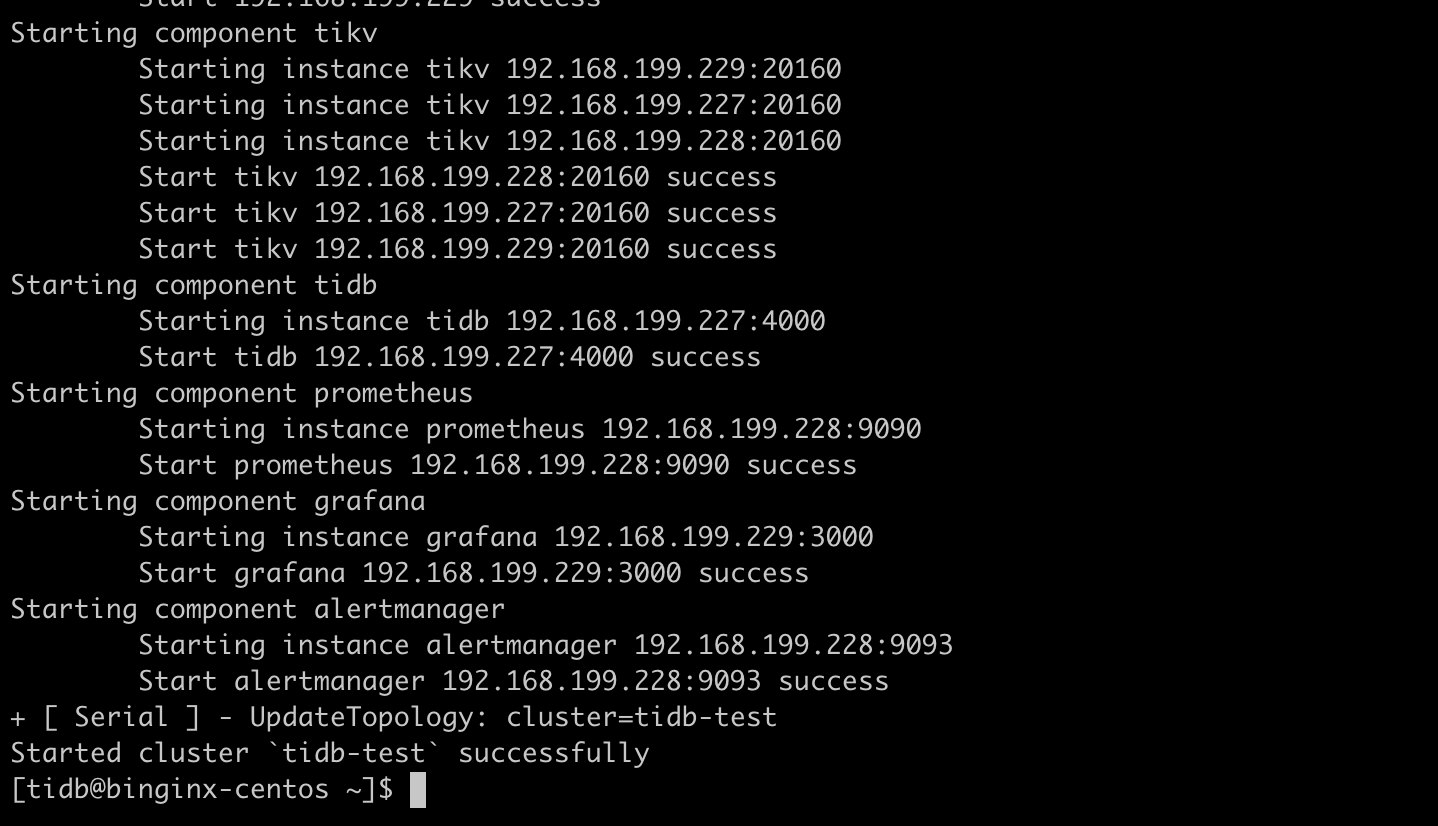
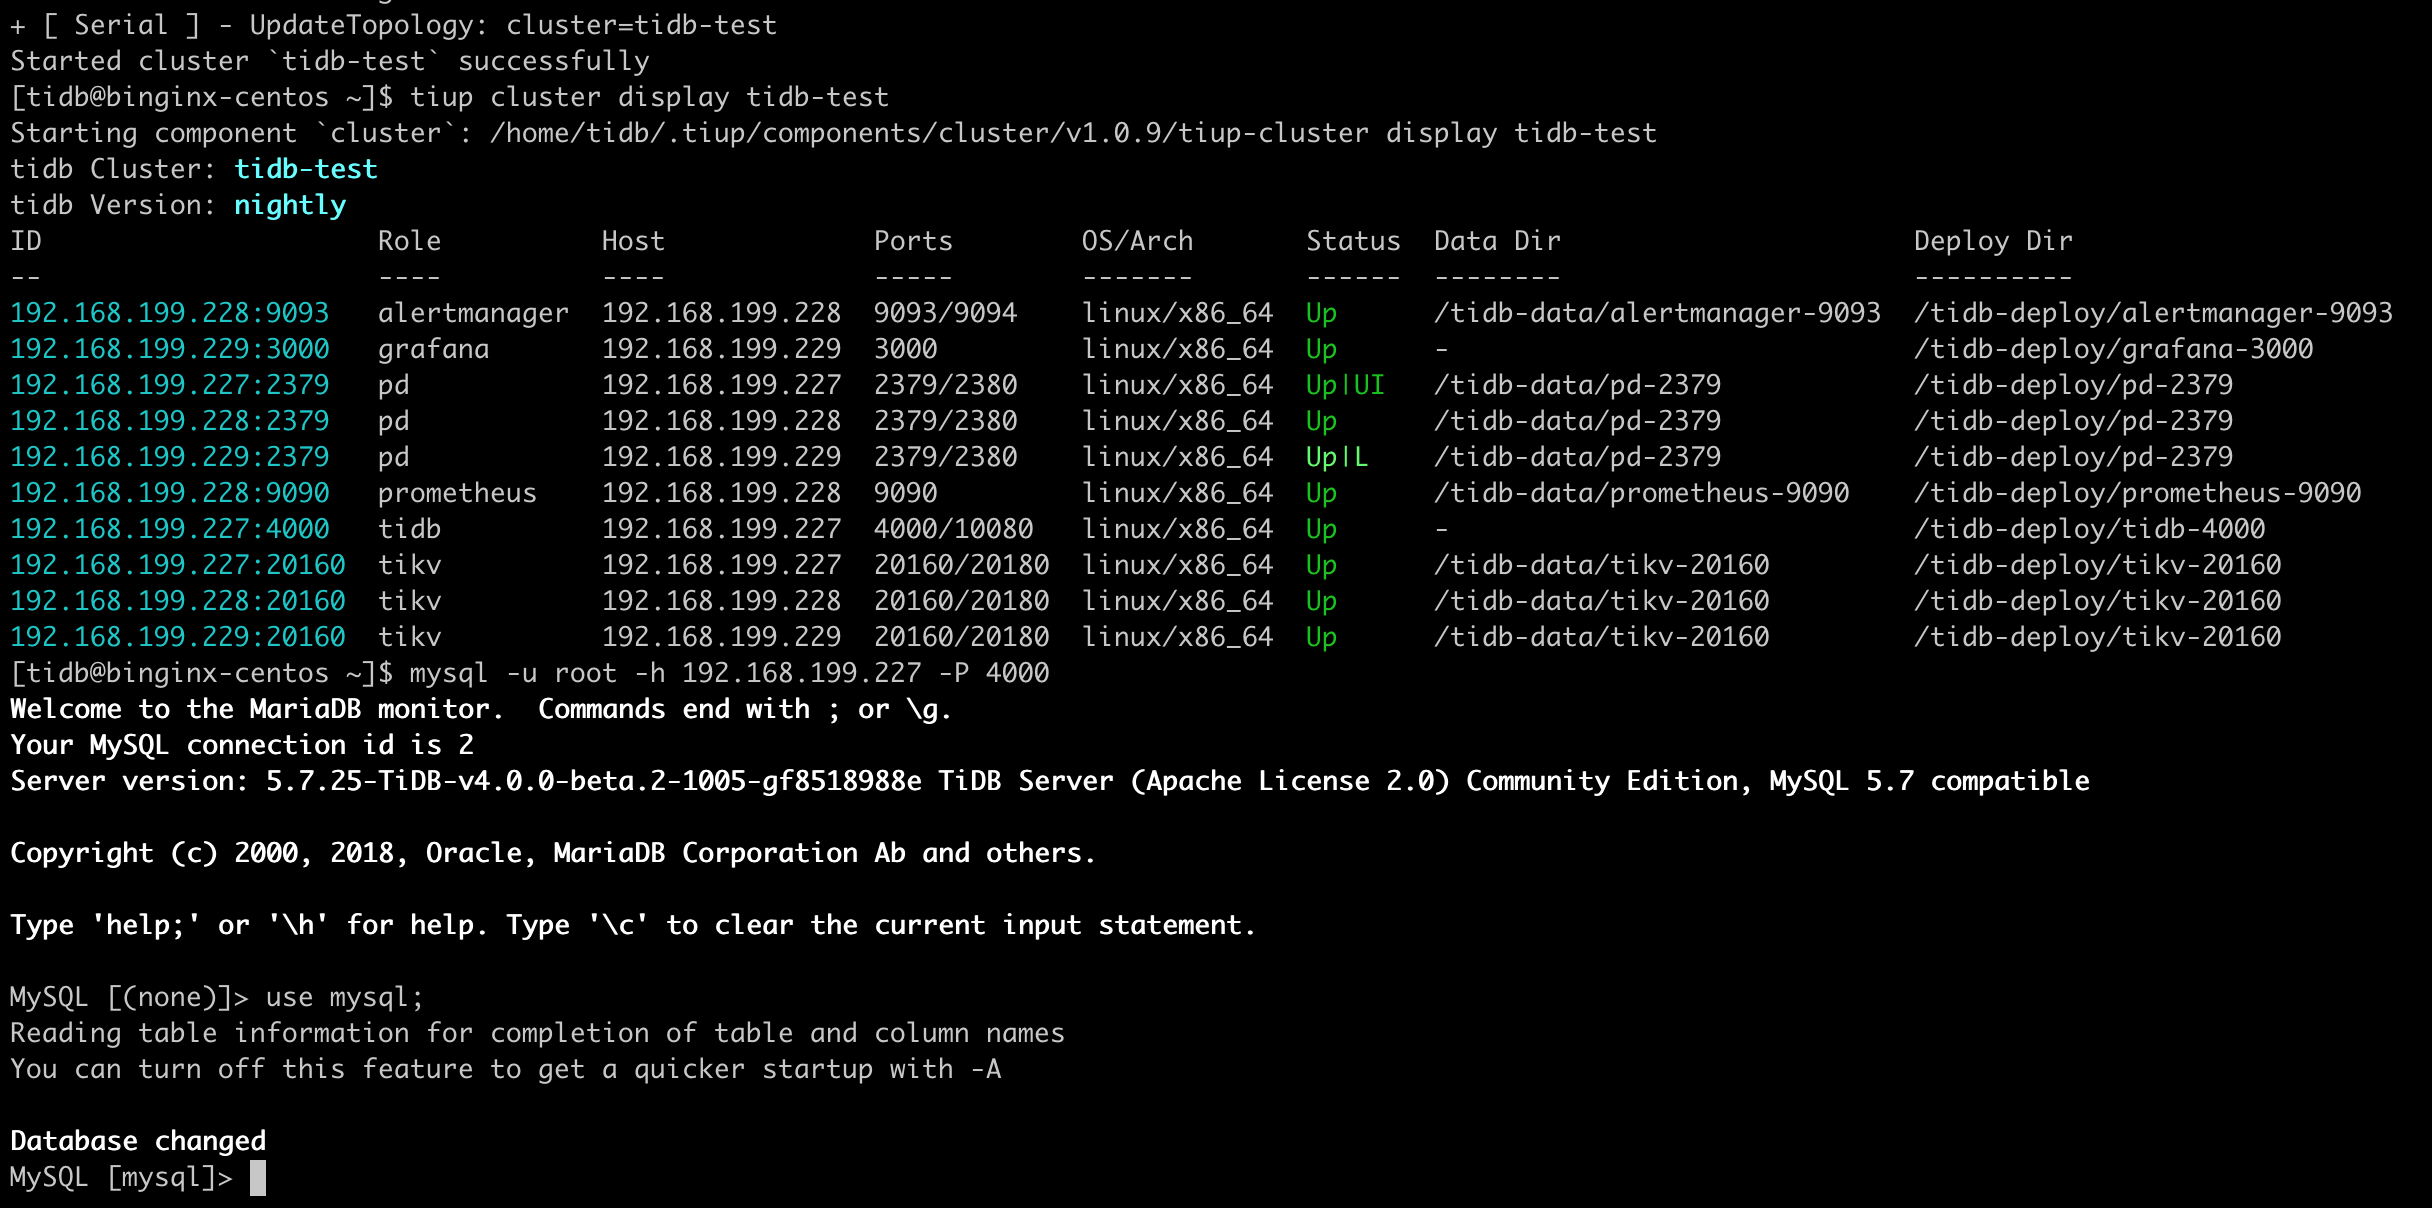
启动集群,并验证集群状态
1
2
3
| tiup cluster start tidb-test
tiup cluster display tidb-test
mysql -u root -h 192.168.199.227 -P 4000
|
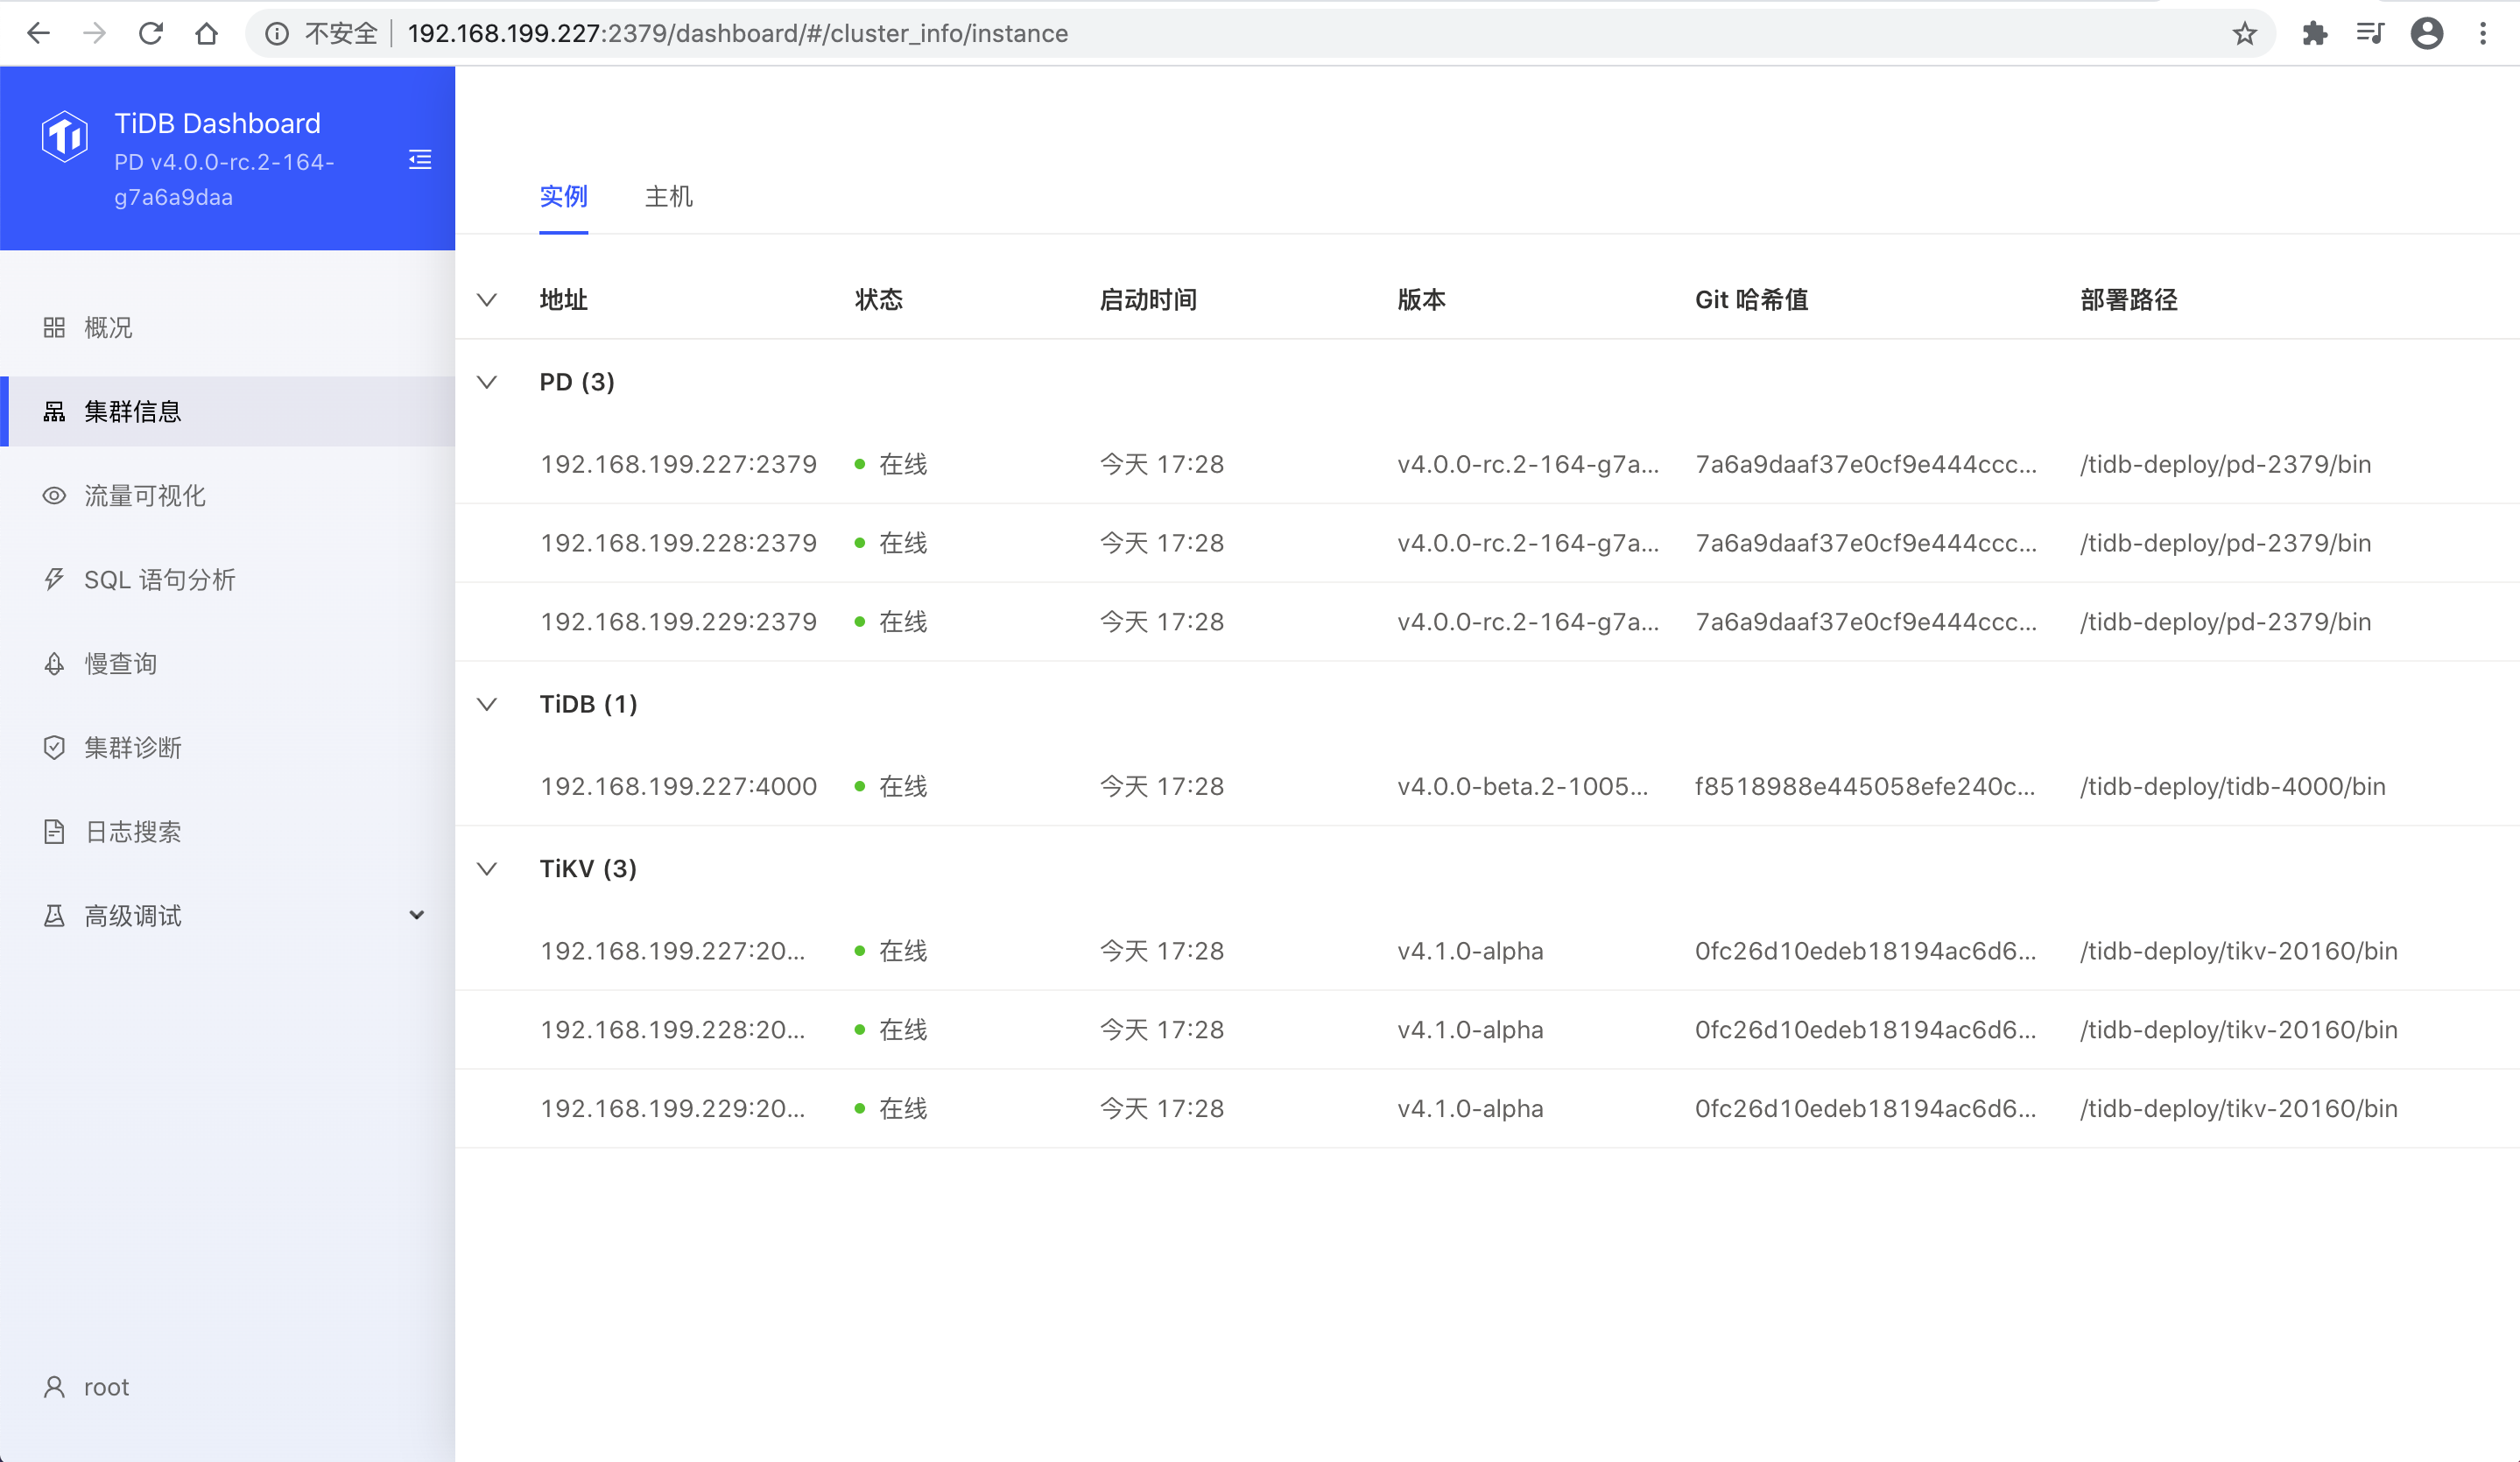
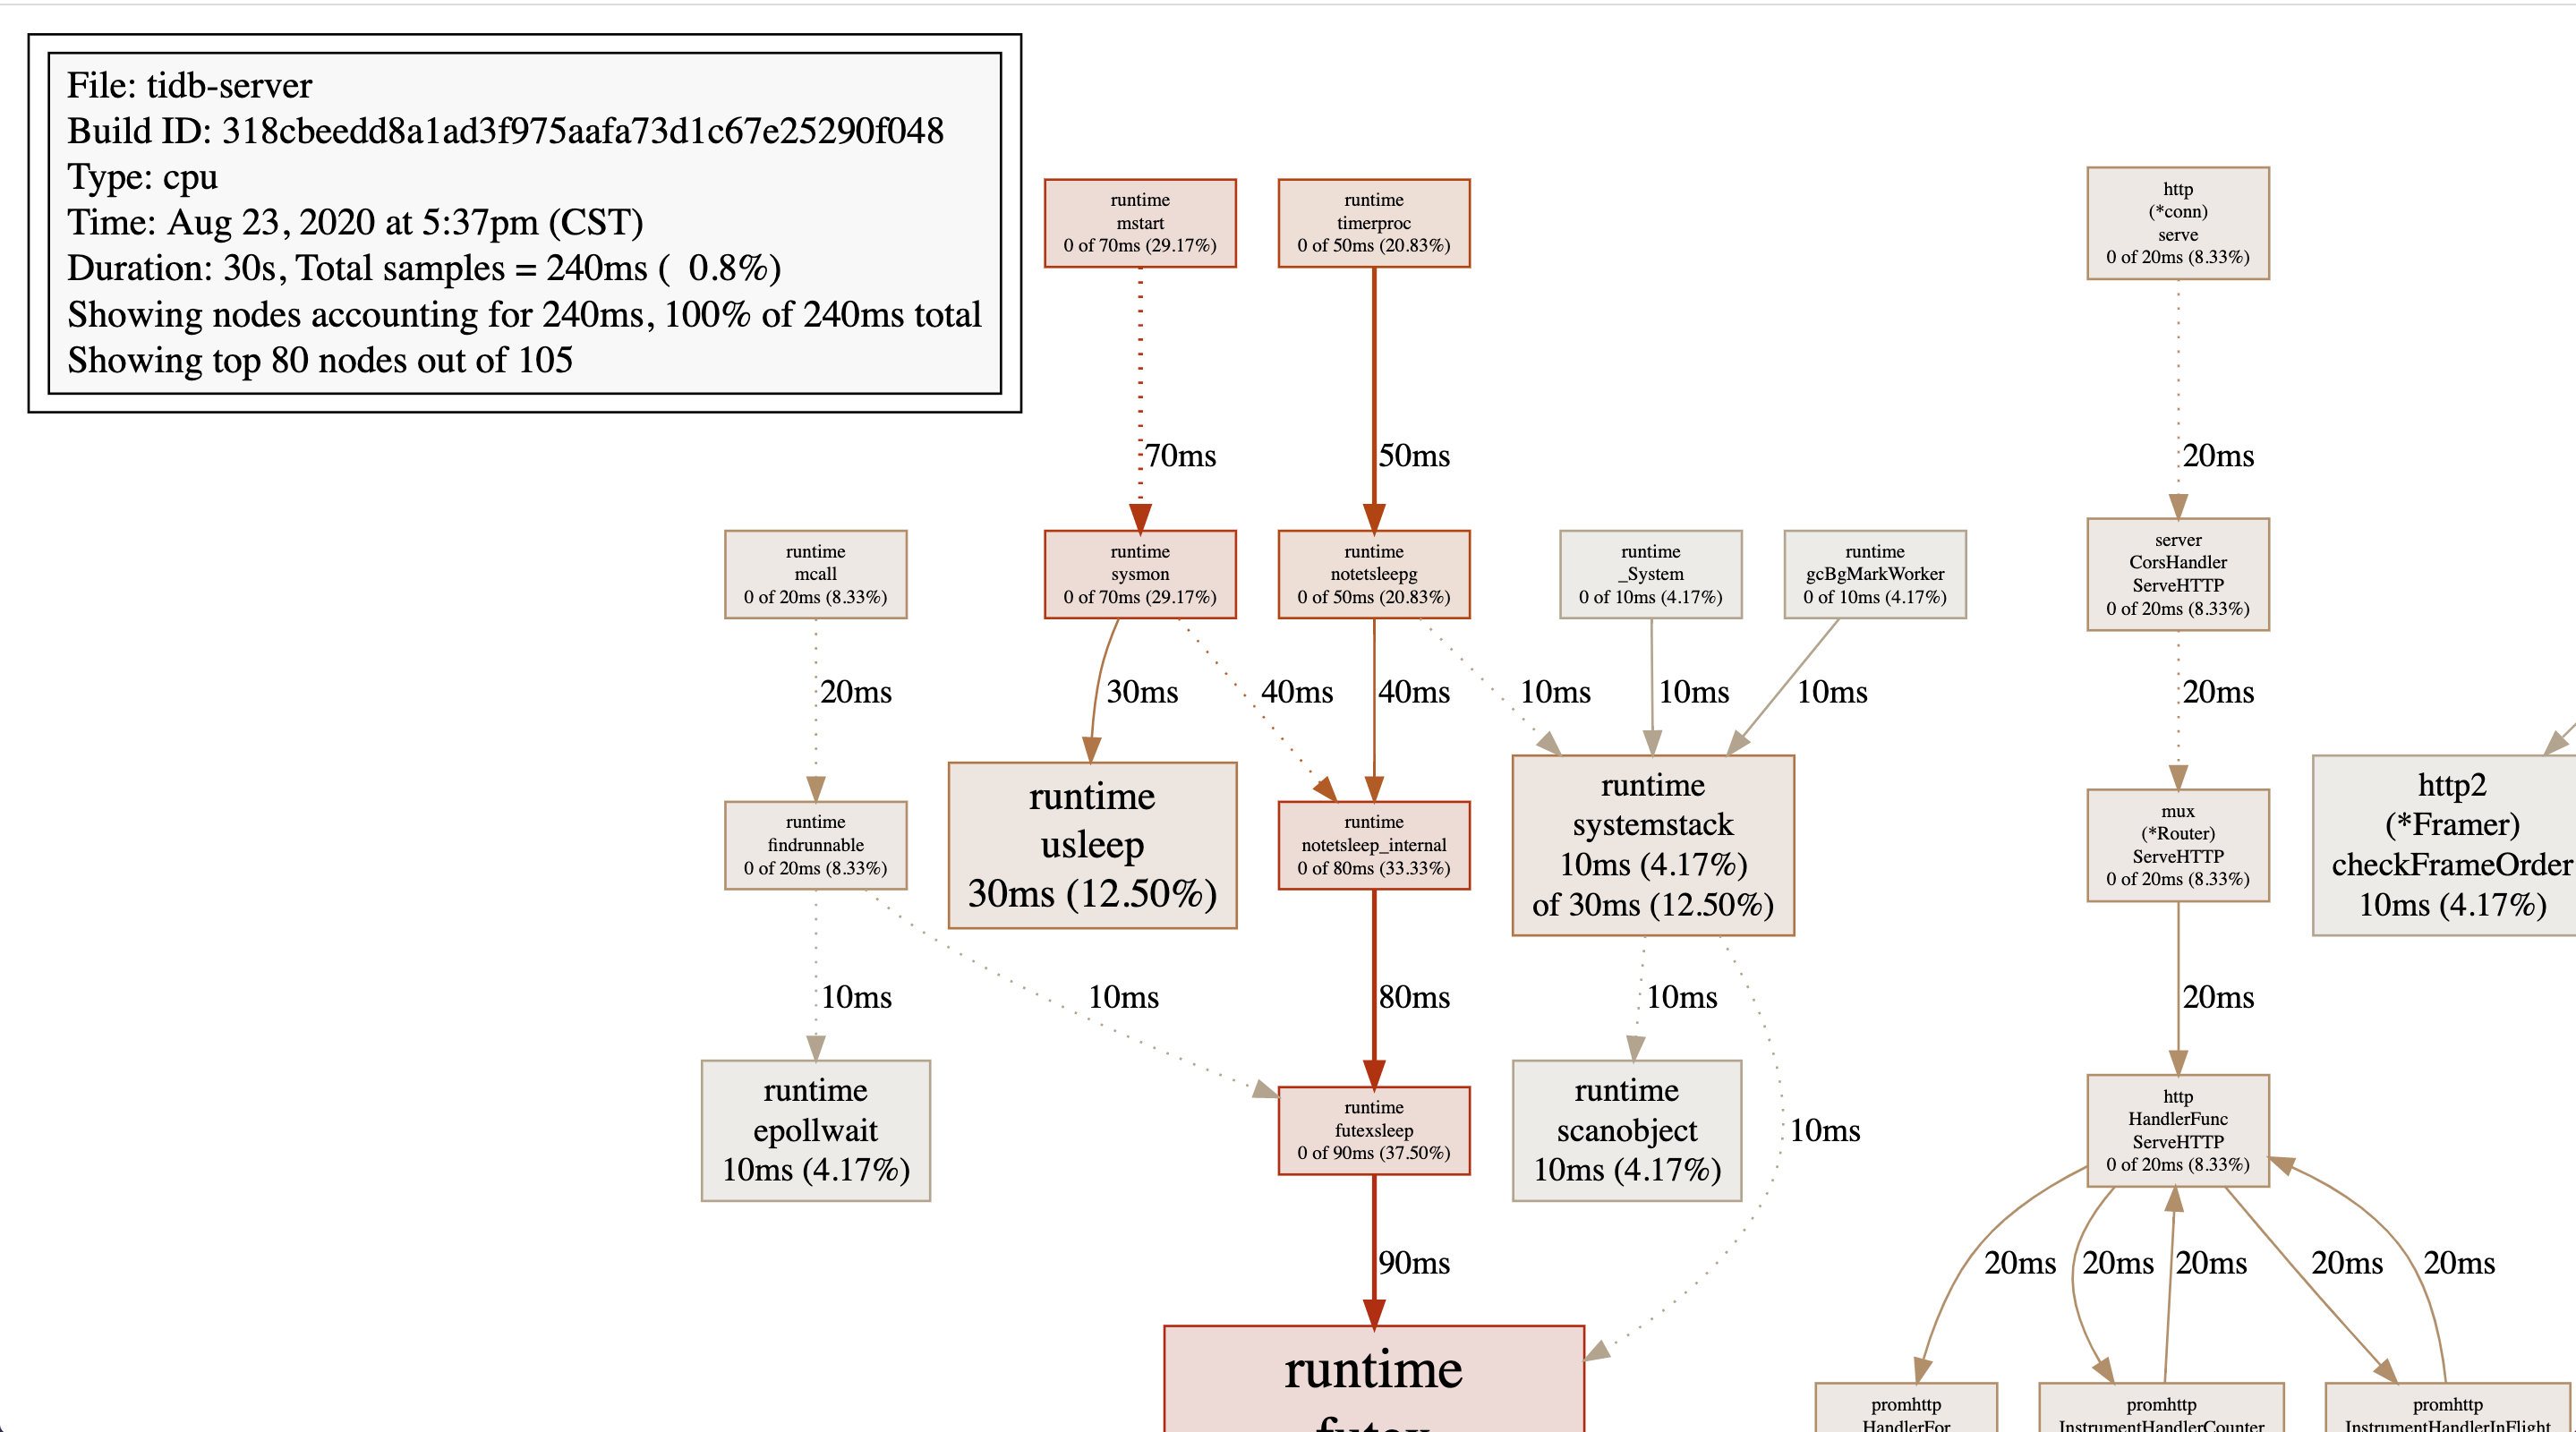
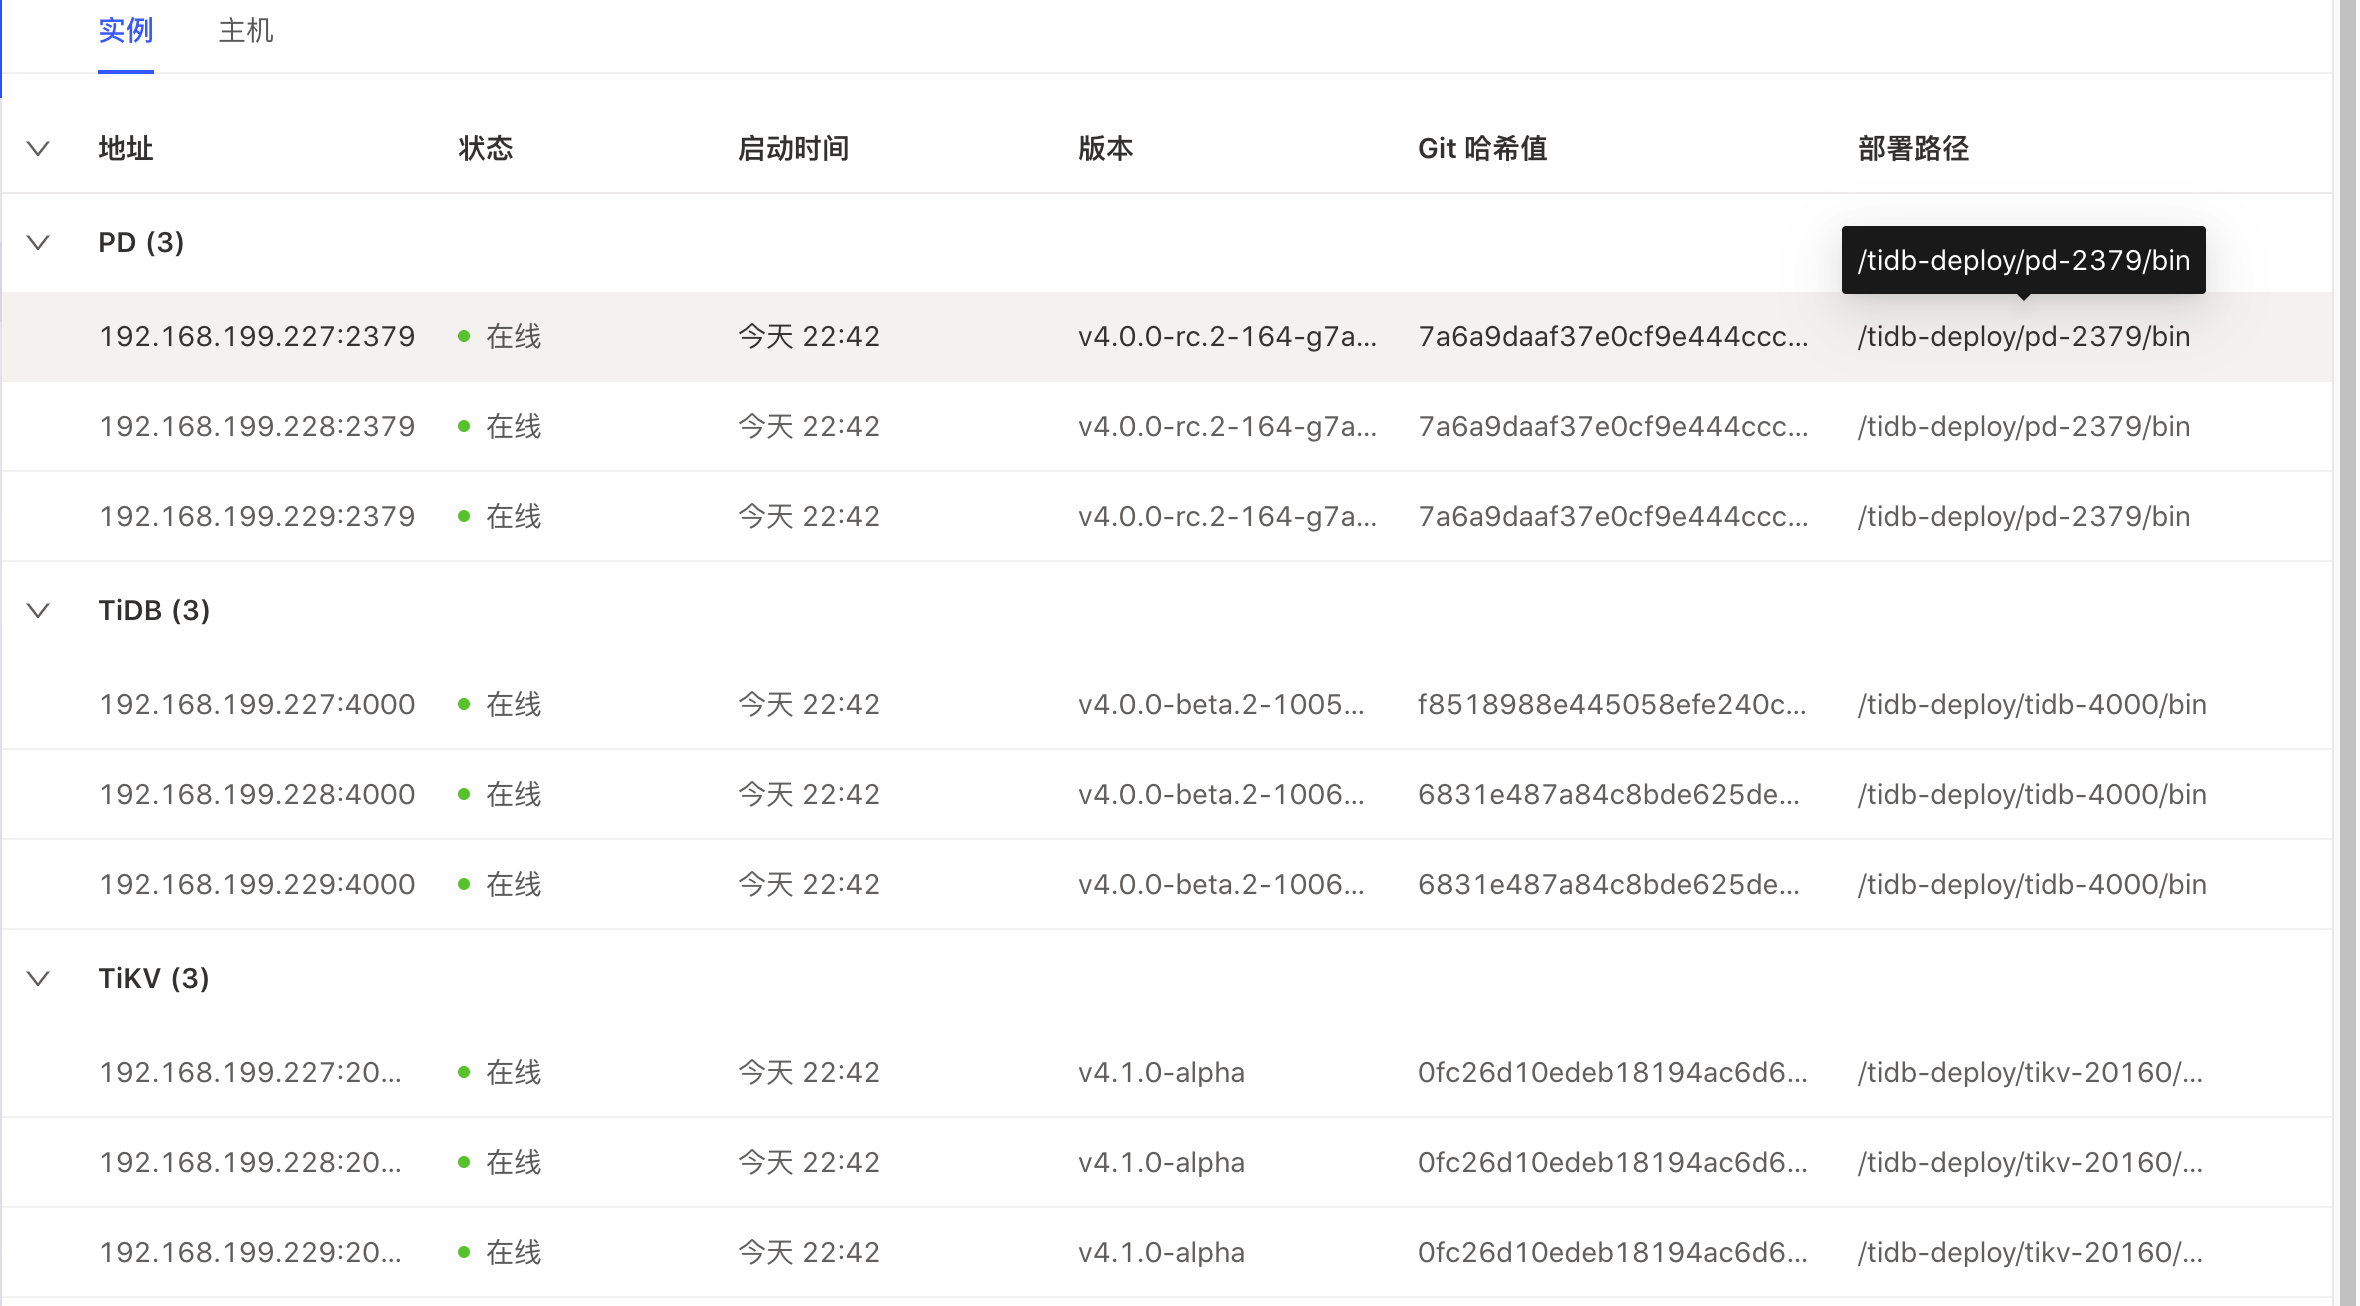
检查dashboard
1
| ## 访问 http://192.168.199.227:2379/dashboard,root用户无需密码,高级测试,查看tidb的性能分析报告
|
使用sysbench进行测试
安装sysbench
1
2
| curl -s https://packagecloud.io/install/repositories/akopytov/sysbench/script.rpm.sh | sudo bash
sudo yum -y install sysbench
|
sysbench 配置
1
2
3
4
5
6
7
8
9
10
11
| mkdir sysbench
cd sysbench
vim sysbench.cfg
## mysql-host=192.168.199.227
## mysql-db=tidbtest
## mysql-port=4000
## mysql-user=root
## time=60
## threads=16
## report-interval=10
## db-driver=mysql
|
创建数据库
1
2
3
4
5
| mysql -u root -h 192.168.199.227 -P 4000
create database tidbtest;
use tidbtest;
## 导入数据前设置为乐观事务模式
set global tidb_disable_txn_auto_retry=off;
|
导入数据
1
| sysbench oltp_update_non_index --config-file=sysbench.cfg --threads=32 --tables=32 --table-size=10000 prepare
|
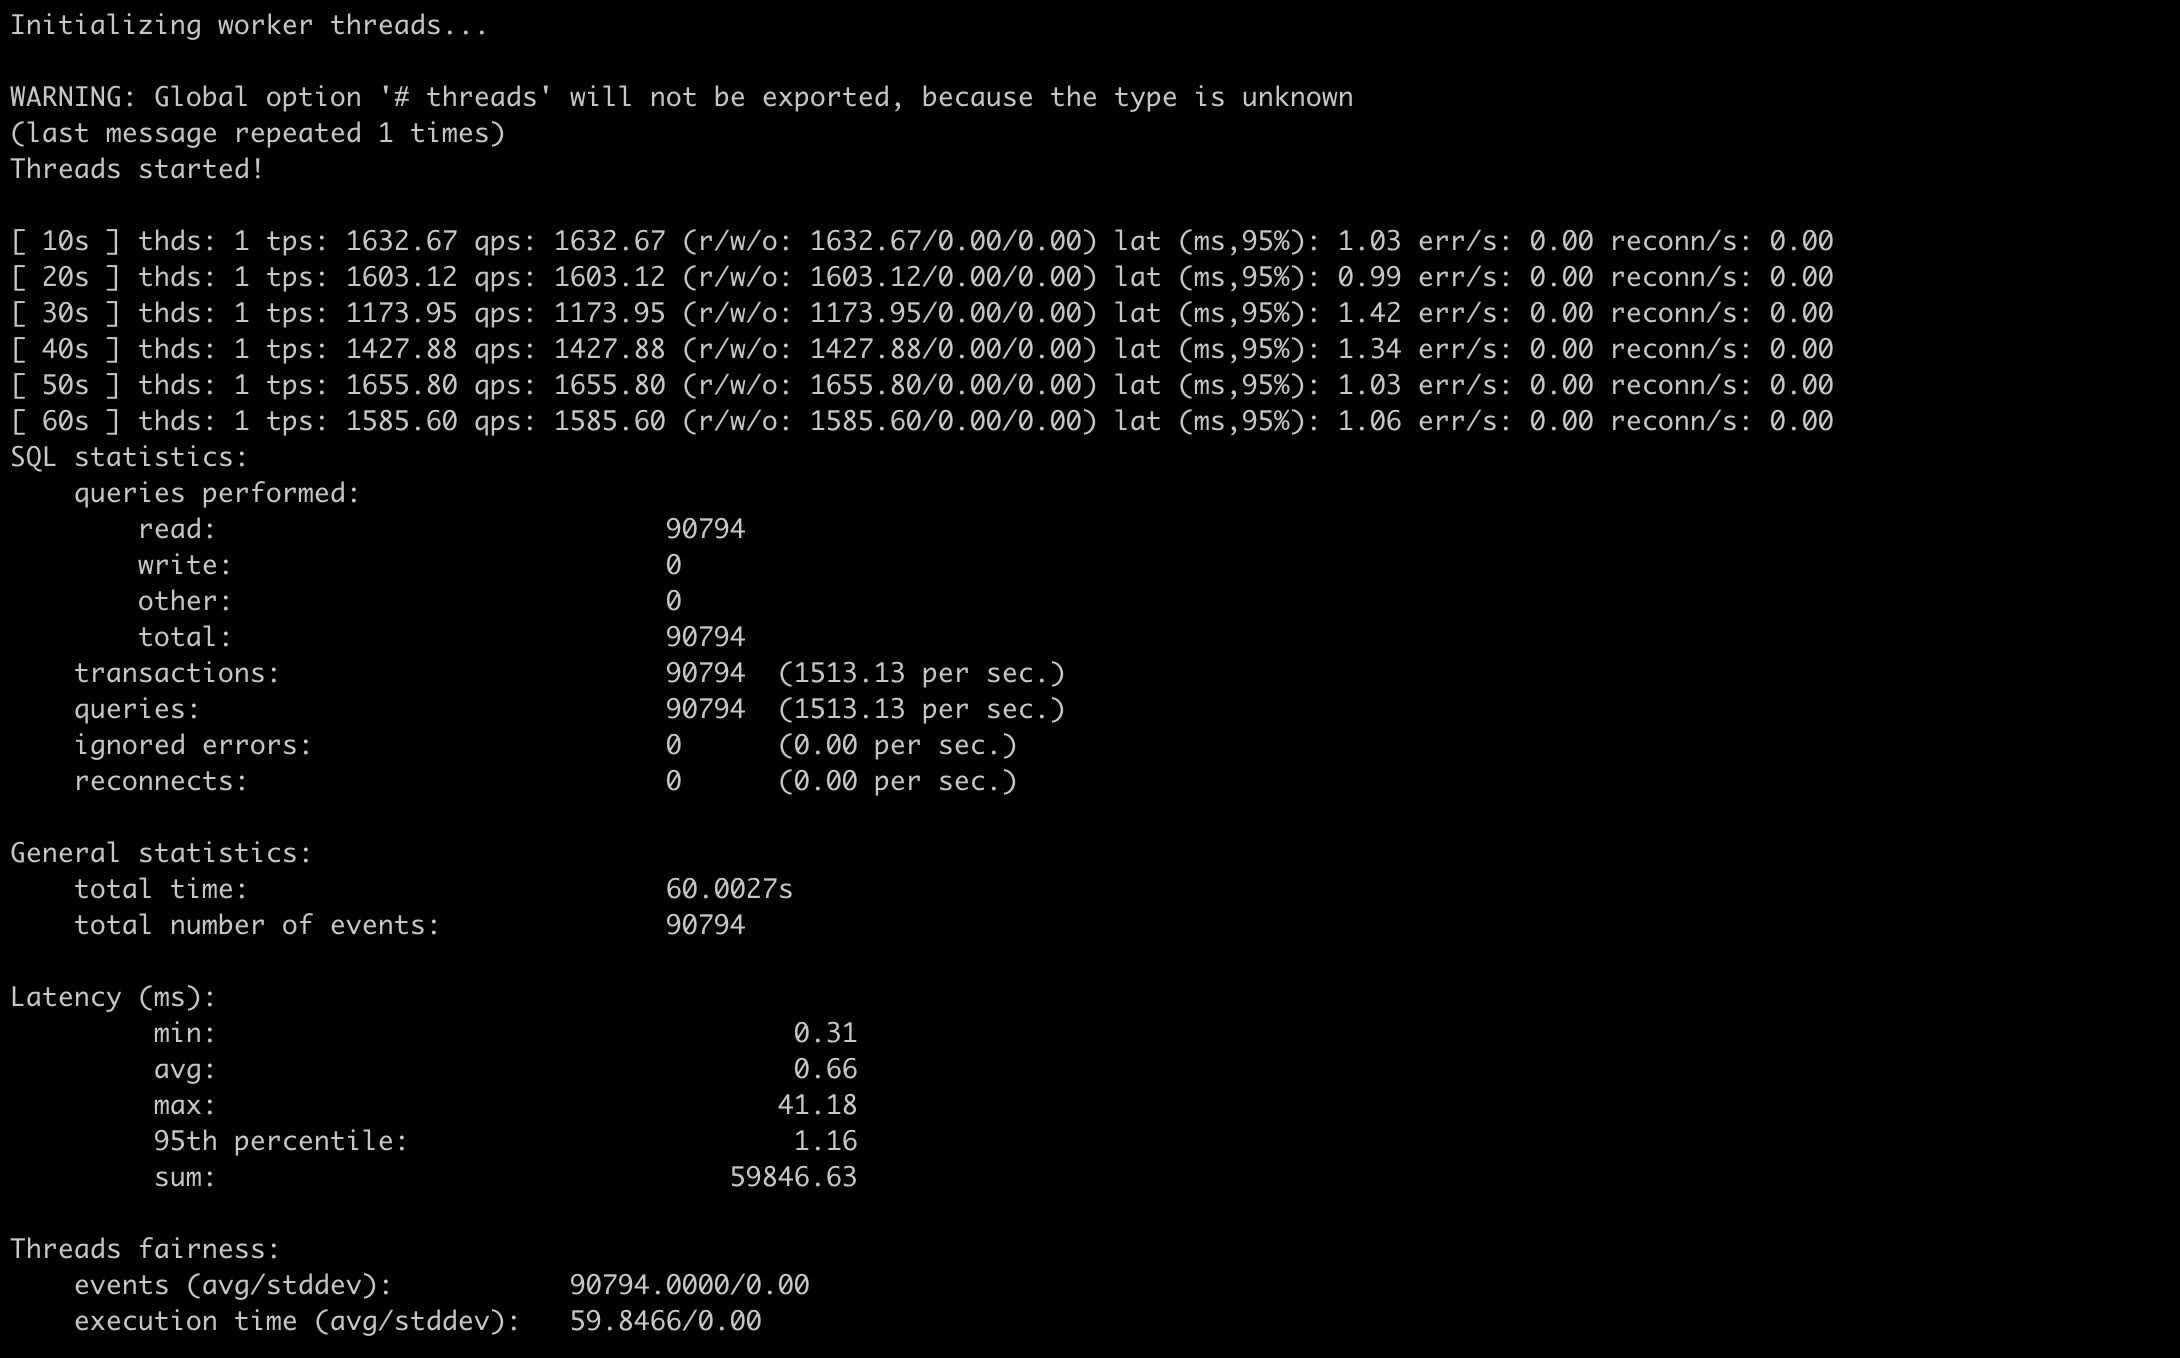
Point select测试
1
2
| ## threads=1
sysbench --config-file=sysbench.cfg oltp_point_select --tables=32 --table-size=10000 run
|
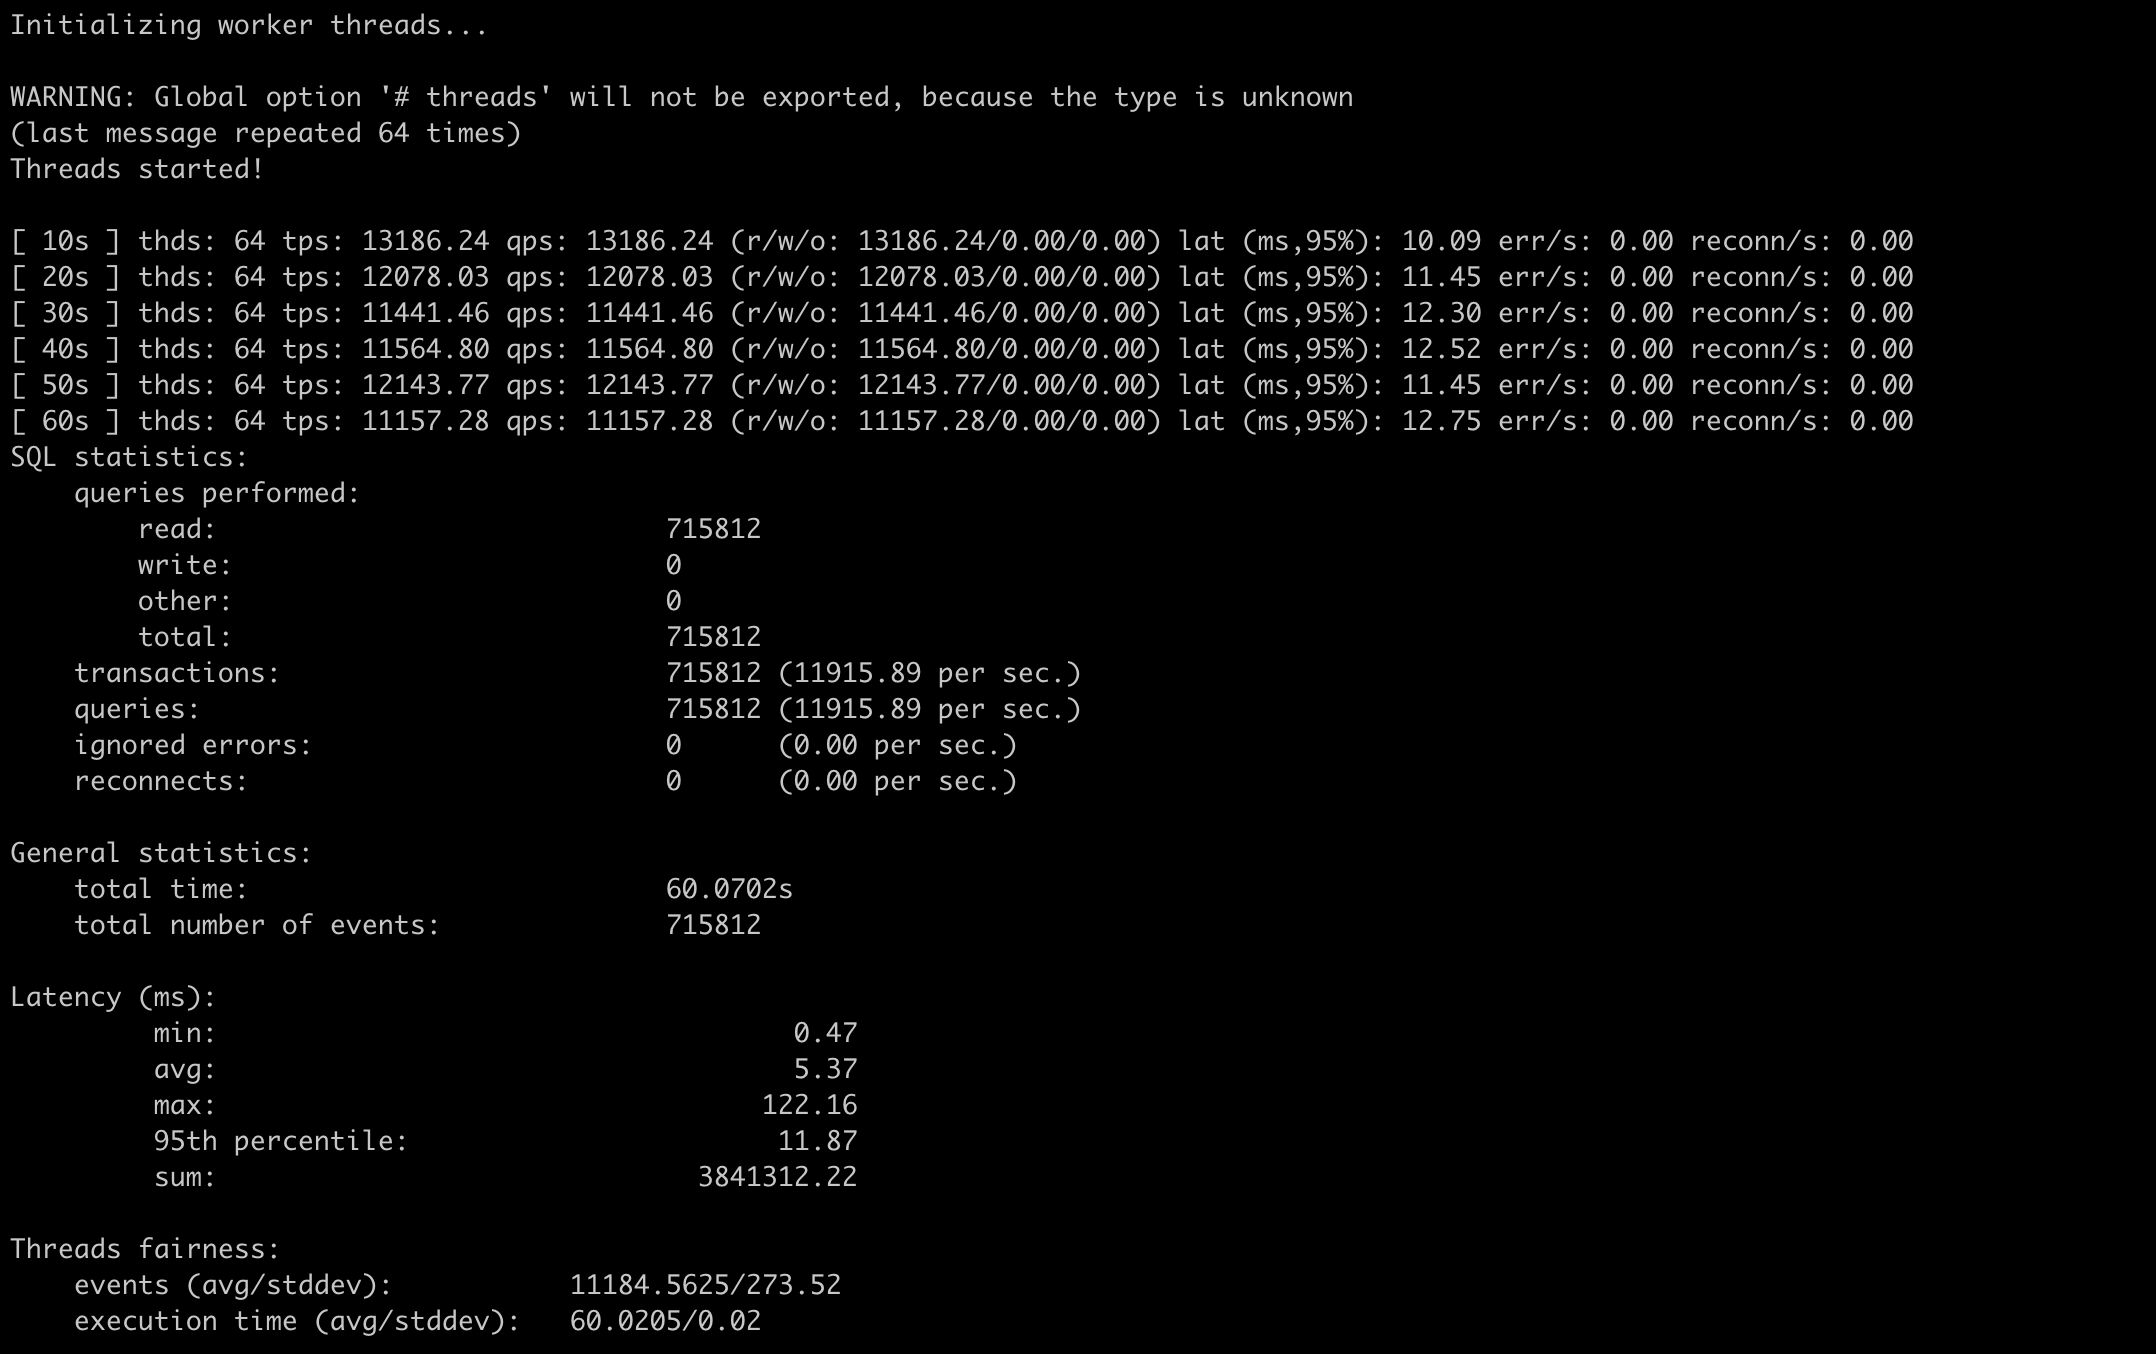
1
2
| ## threads=64
sysbench --config-file=sysbench.cfg oltp_point_select --threads=64 --tables=32 --table-size=10000 run
|
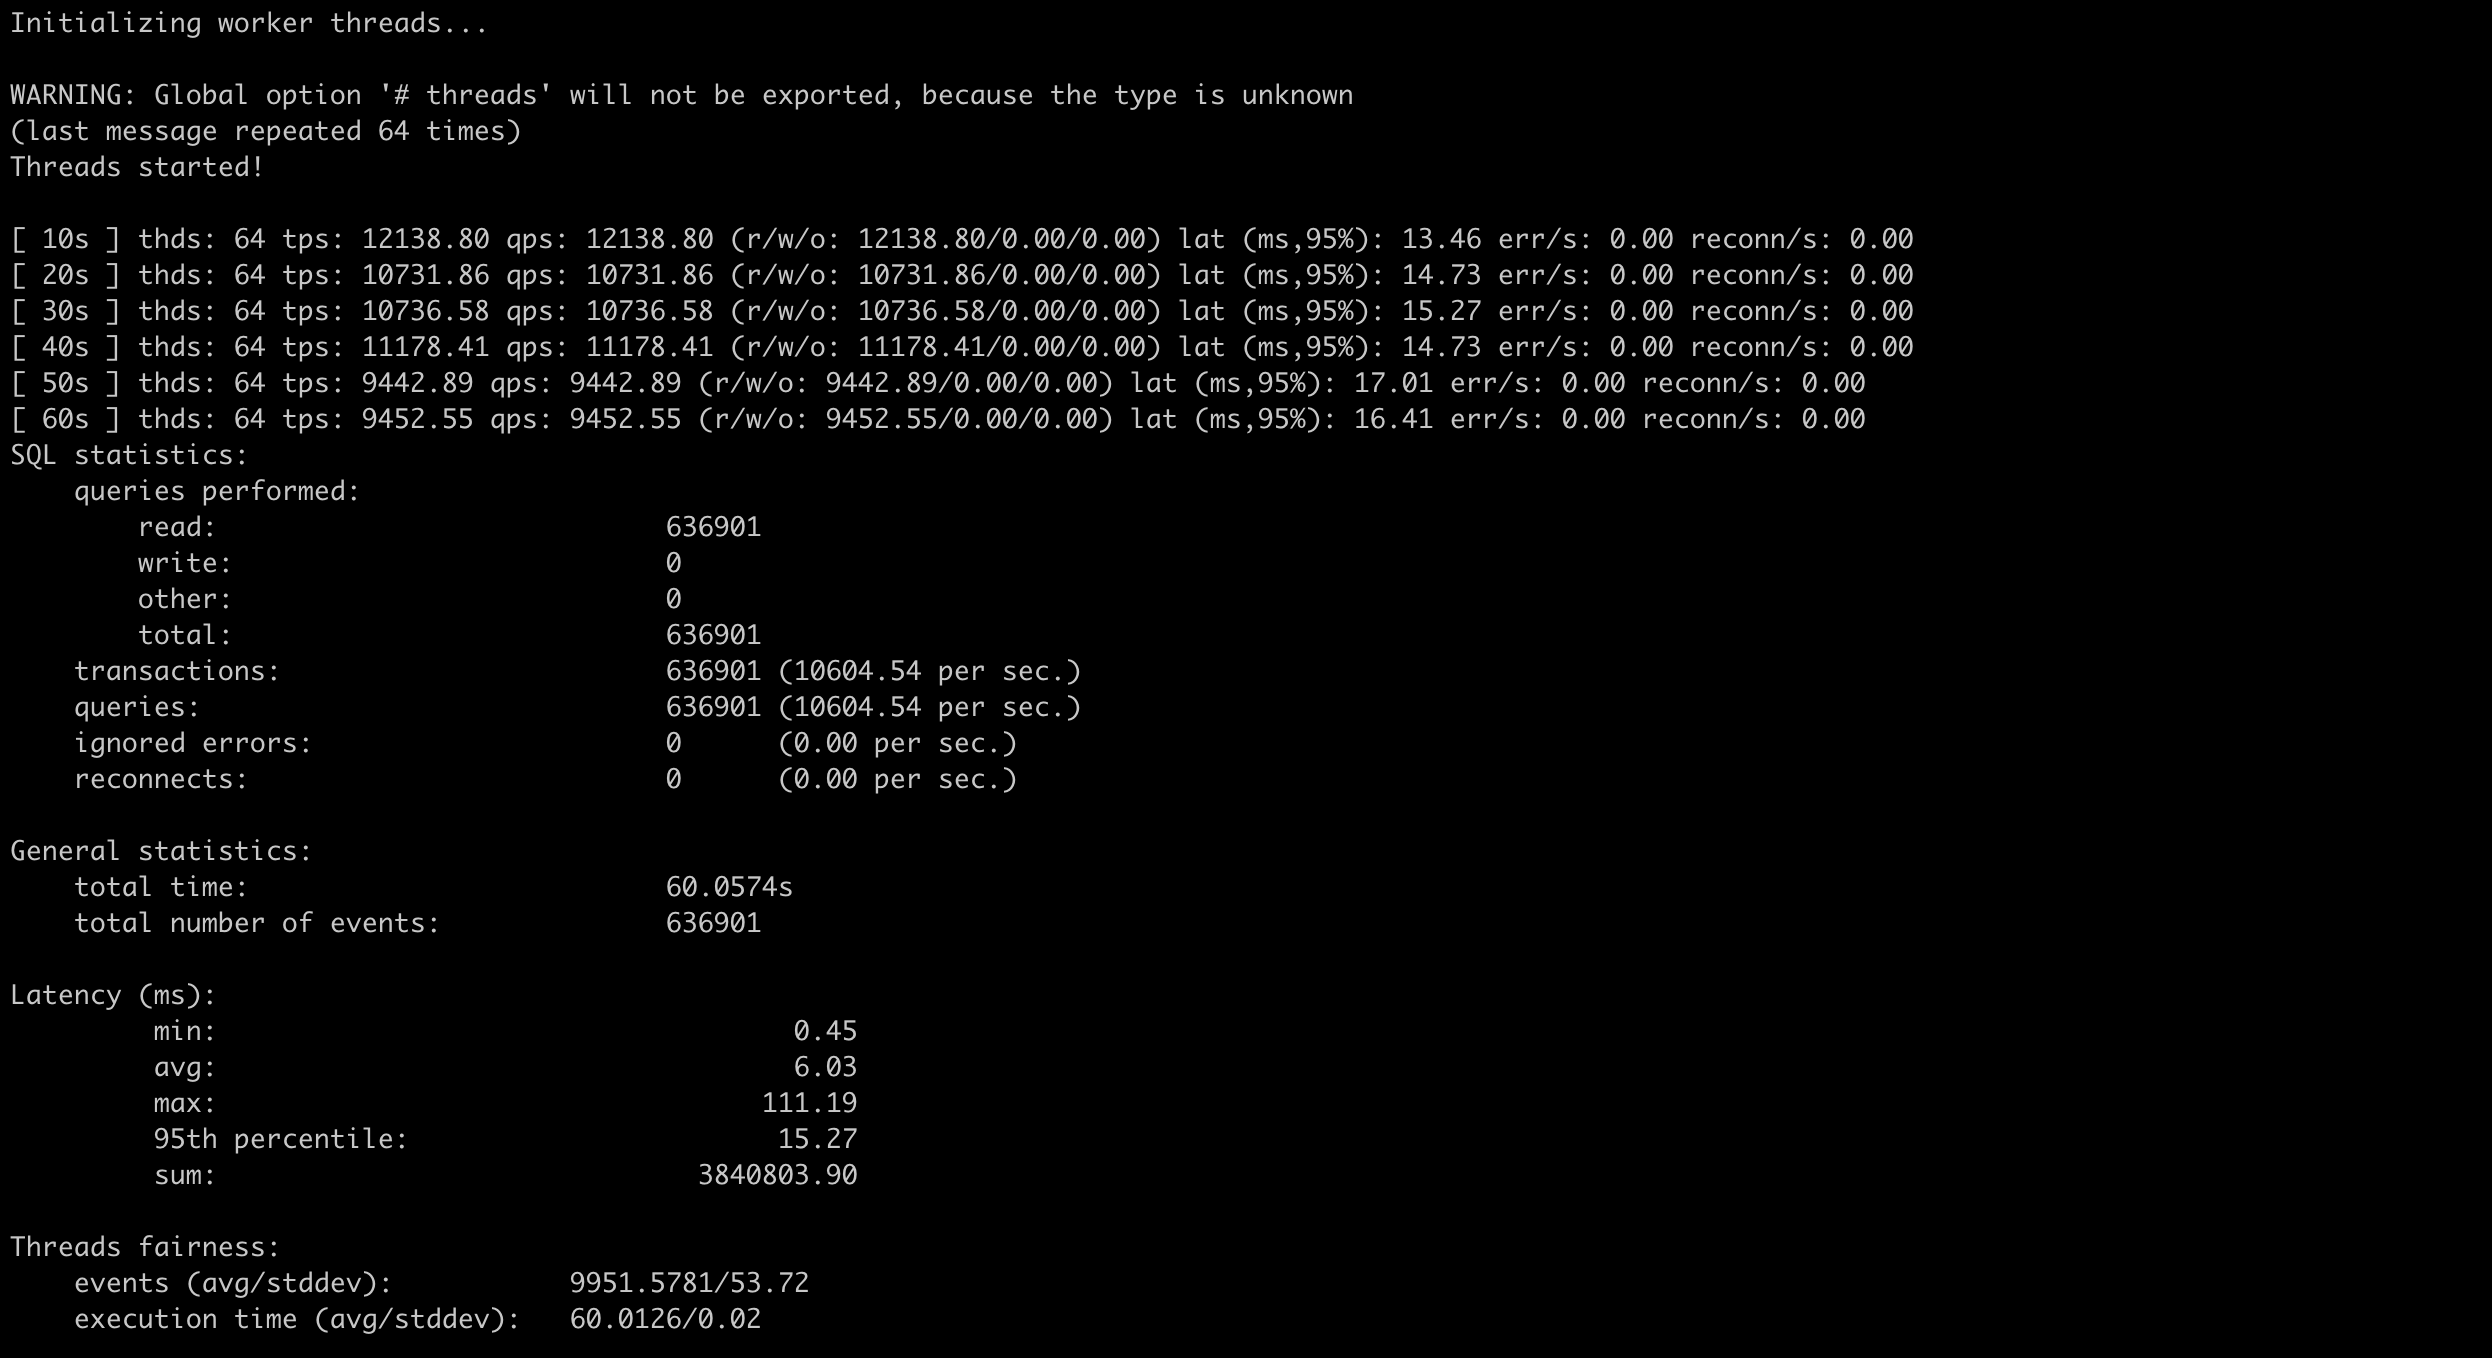
线程数增加到64后,qps有了将近6~8倍的提升
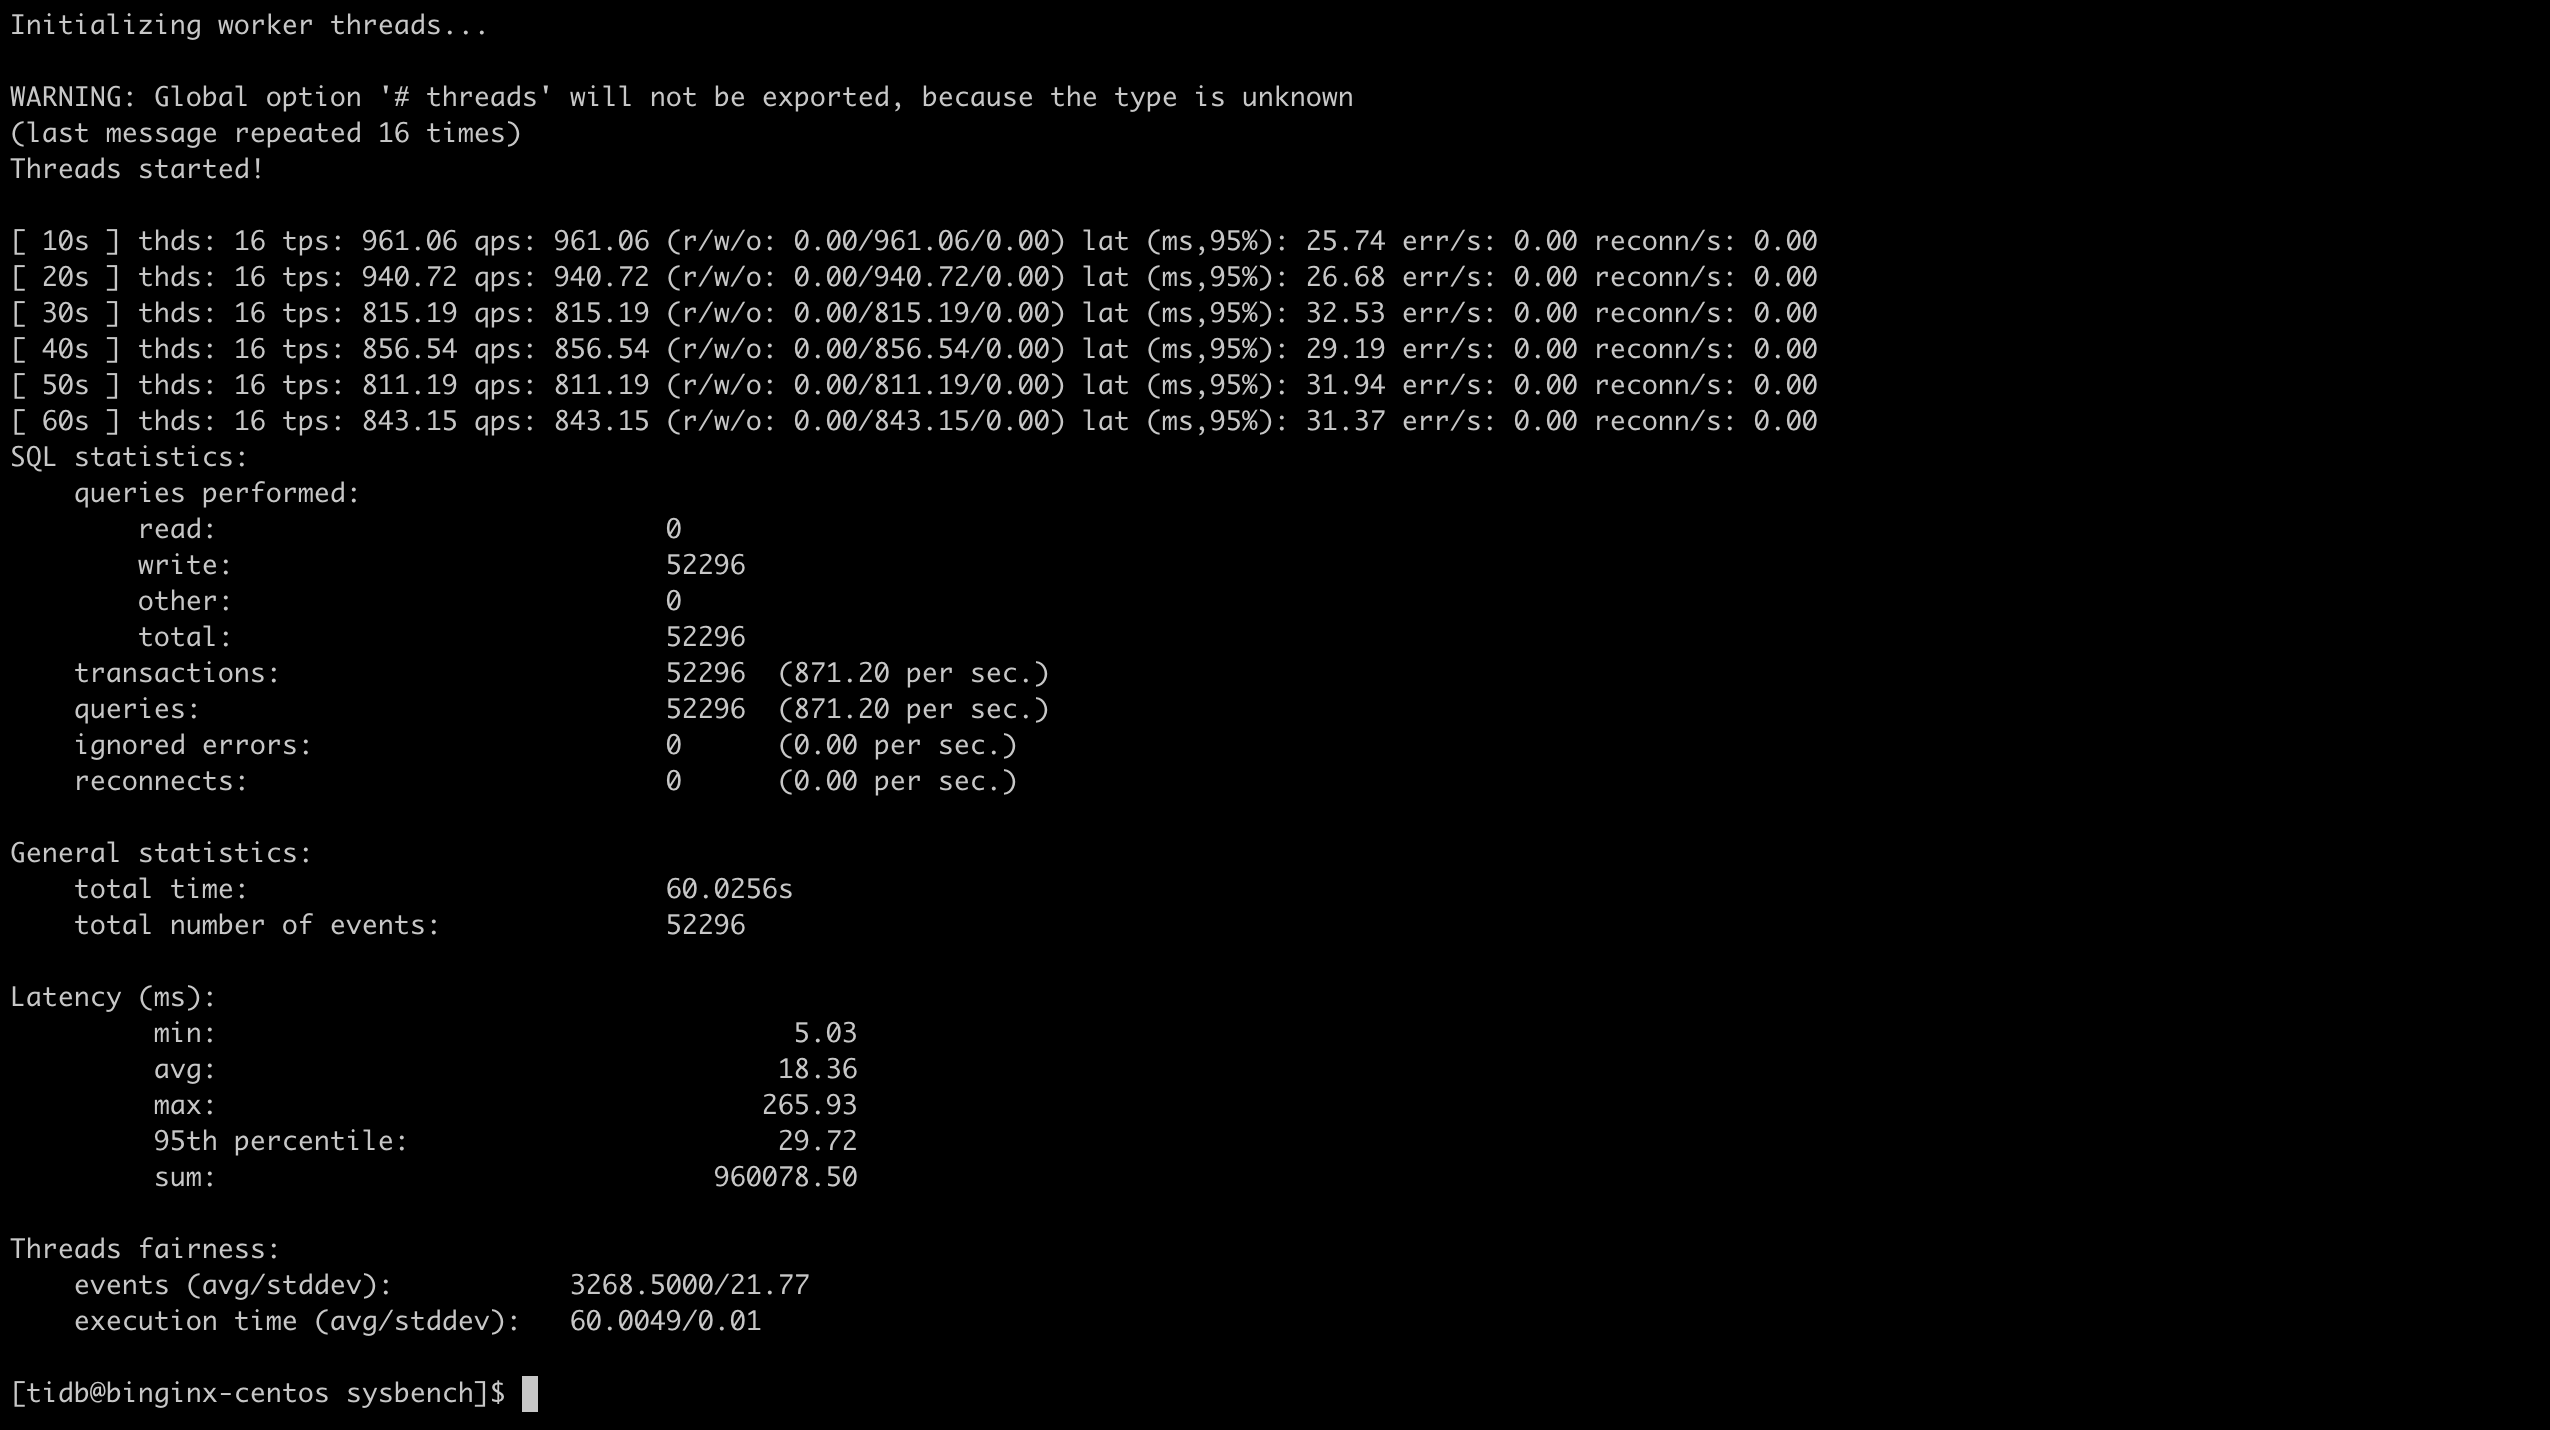
Update index 测试
1
2
| ## threads=16
sysbench --config-file=sysbench.cfg oltp_update_index --threads=16 --tables=32 --table-size=10000 run
|
1
2
| ## threads=64
sysbench --config-file=sysbench.cfg oltp_update_index --threads=64 --tables=32 --table-size=10000 run
|
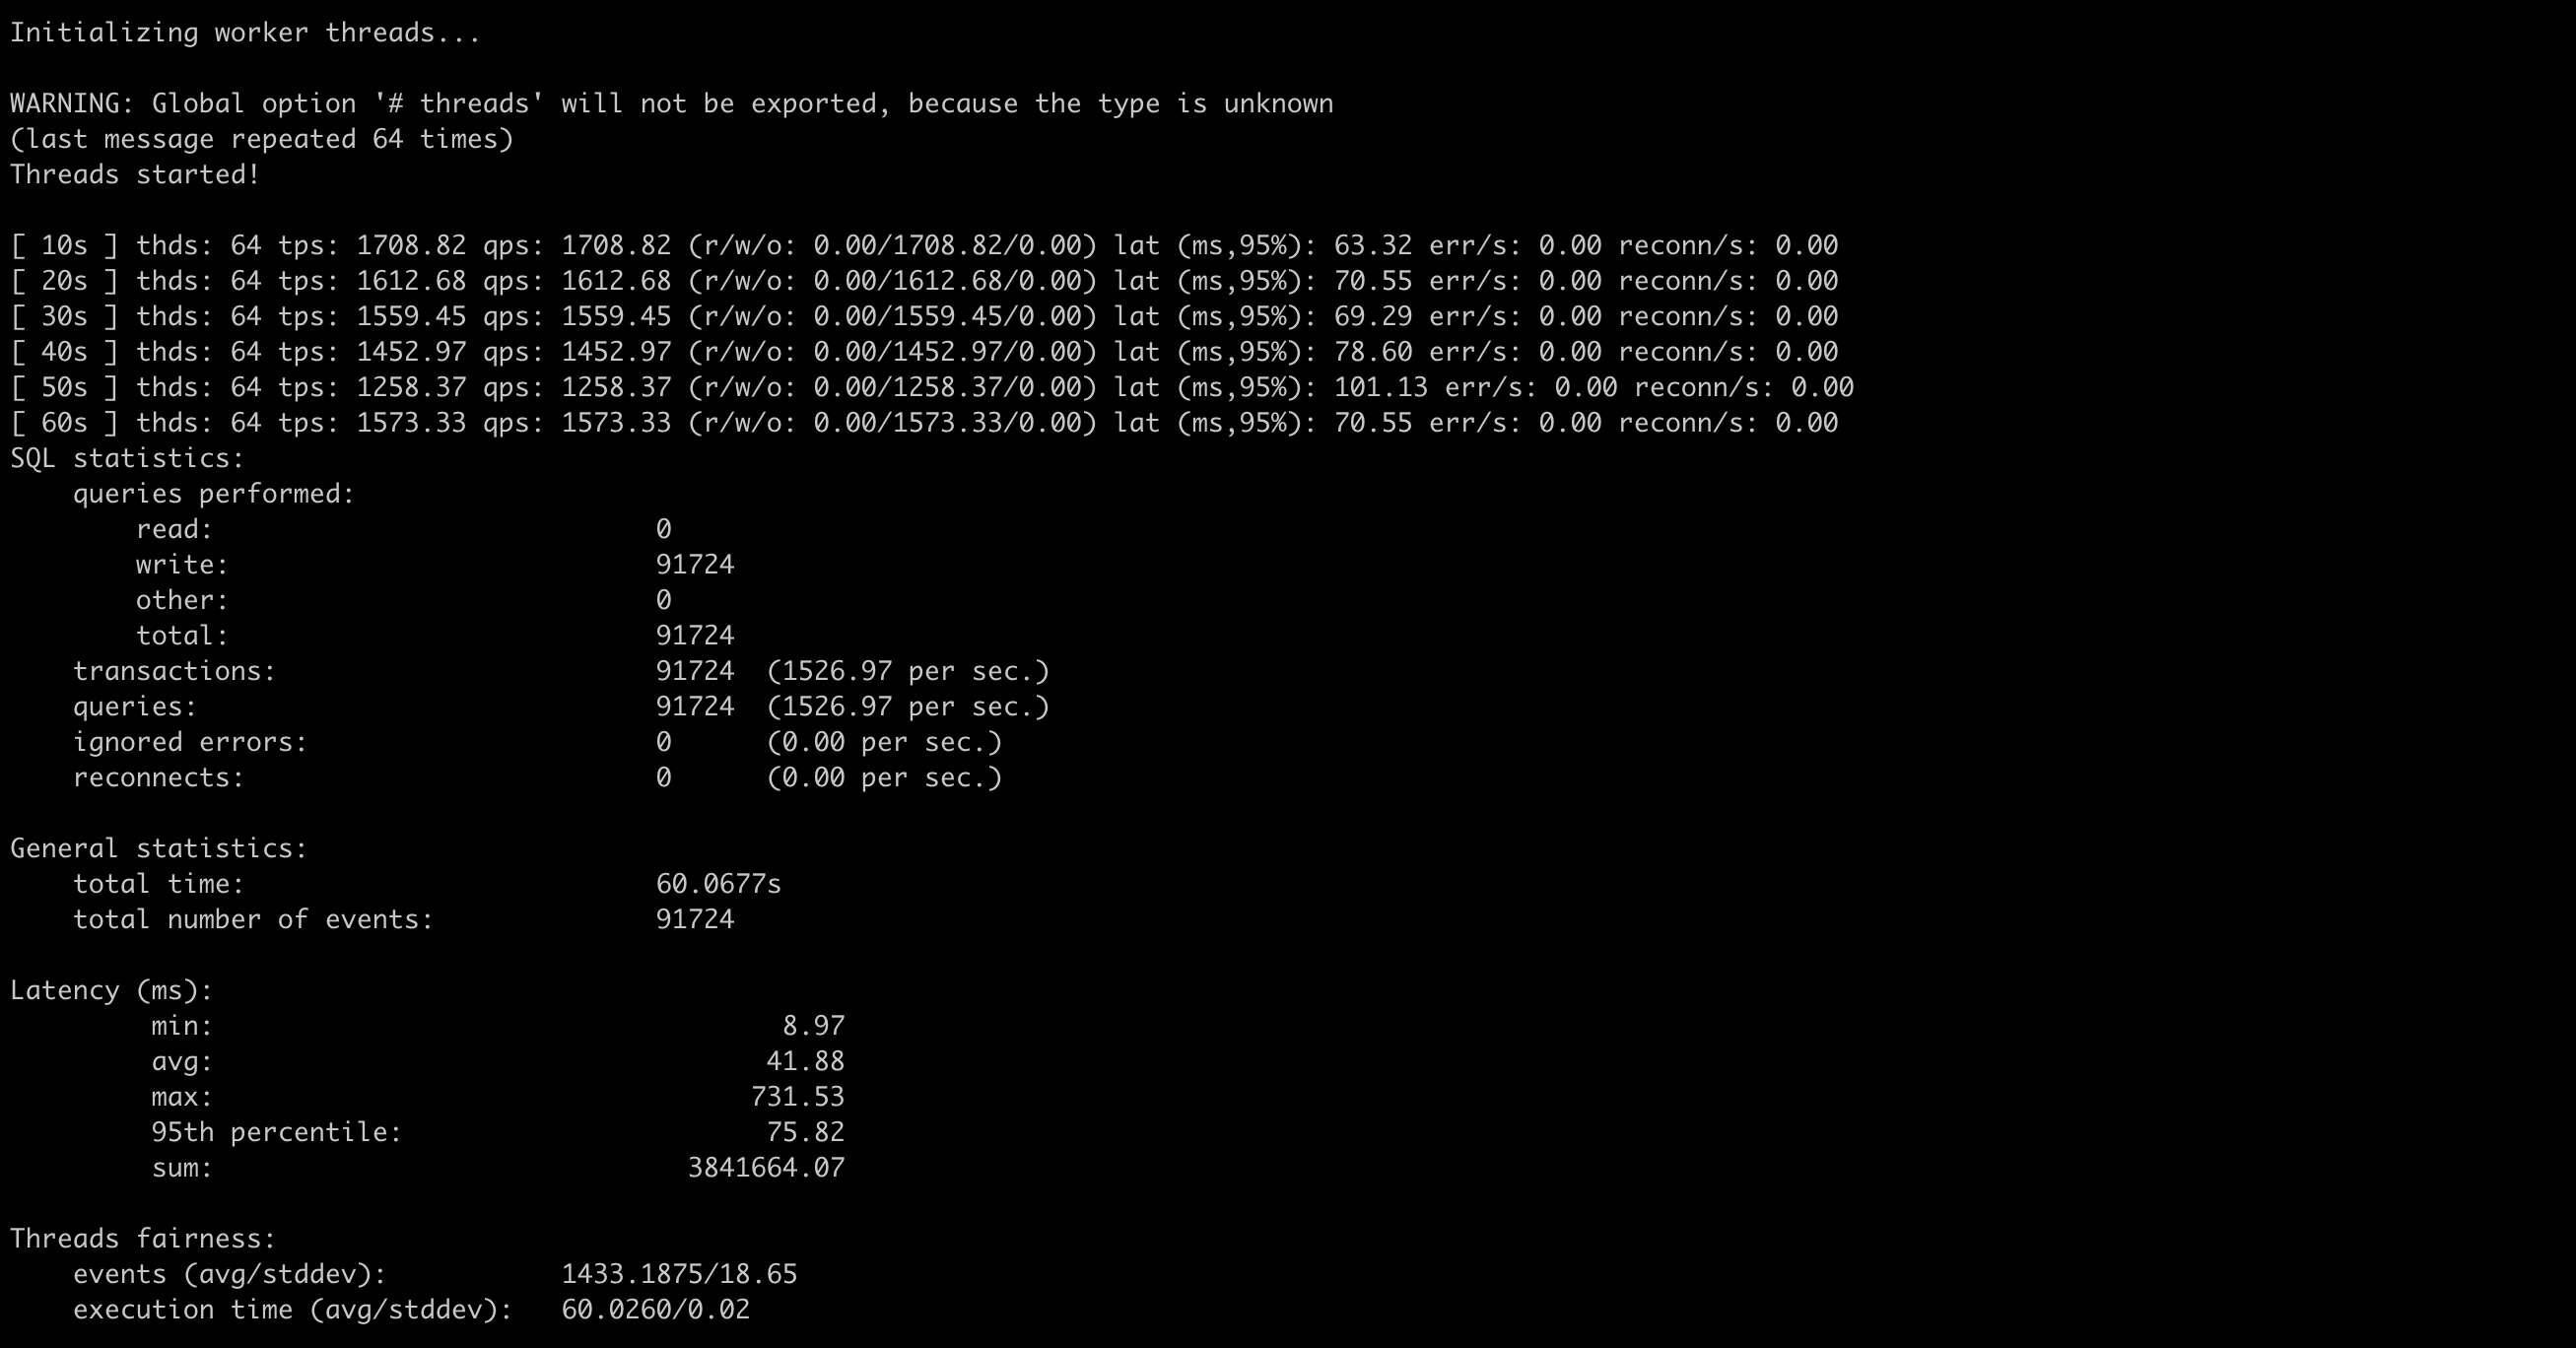
线程数增加到64后,tps有了将近2倍的提升
使用go-tpc测试
安装go-tpc
1
2
3
| git clone https://github.com/pingcap/go-tpc.git
cd go-tpc
make build
|
准备数据
1
2
3
4
| mysql -u root -h 192.168.199.227 -P 4000
create database tpcc
cd go-tpcc/bin
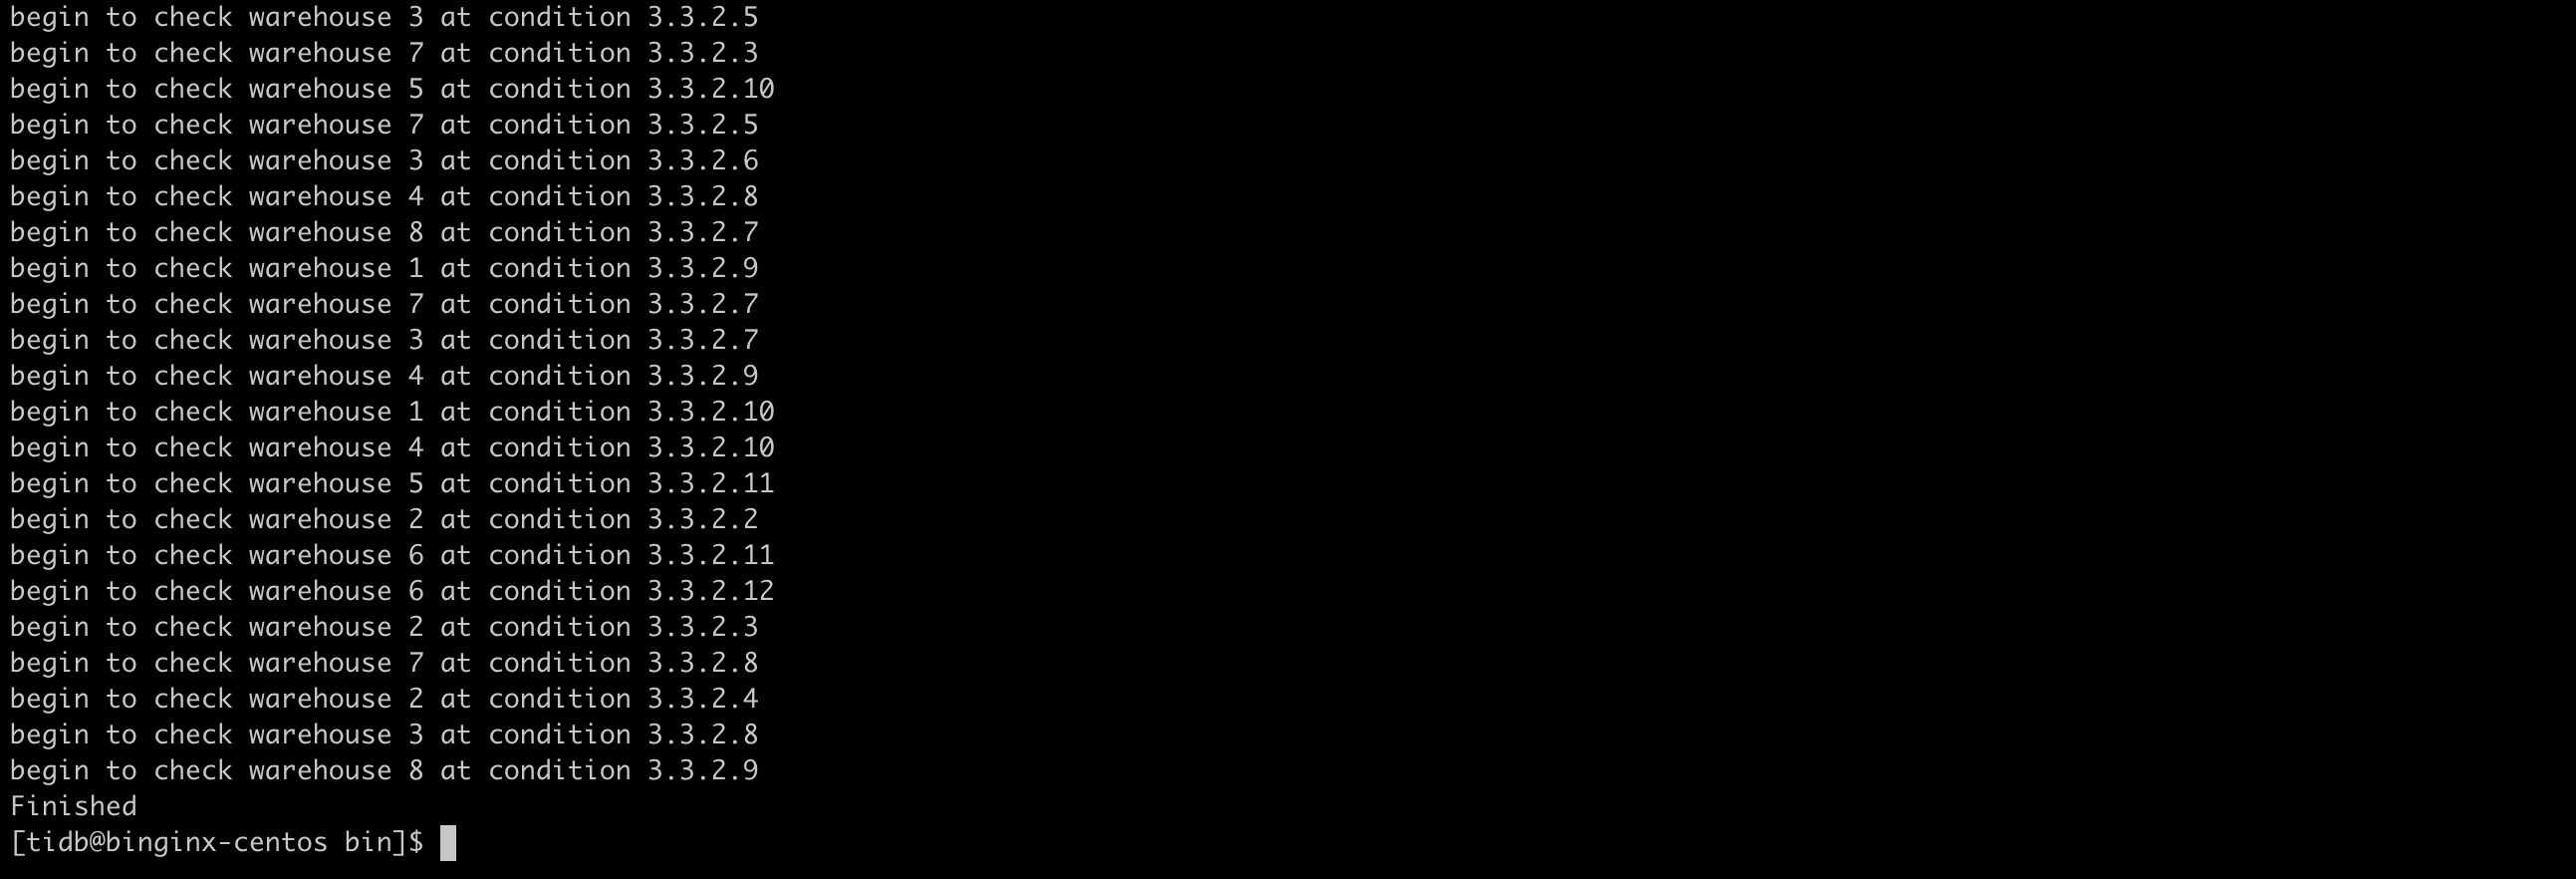
./go-tpc tpcc -H 192.168.199.227 -P 4000 -D tpcc --warehouses 8 prepare -T 8
|
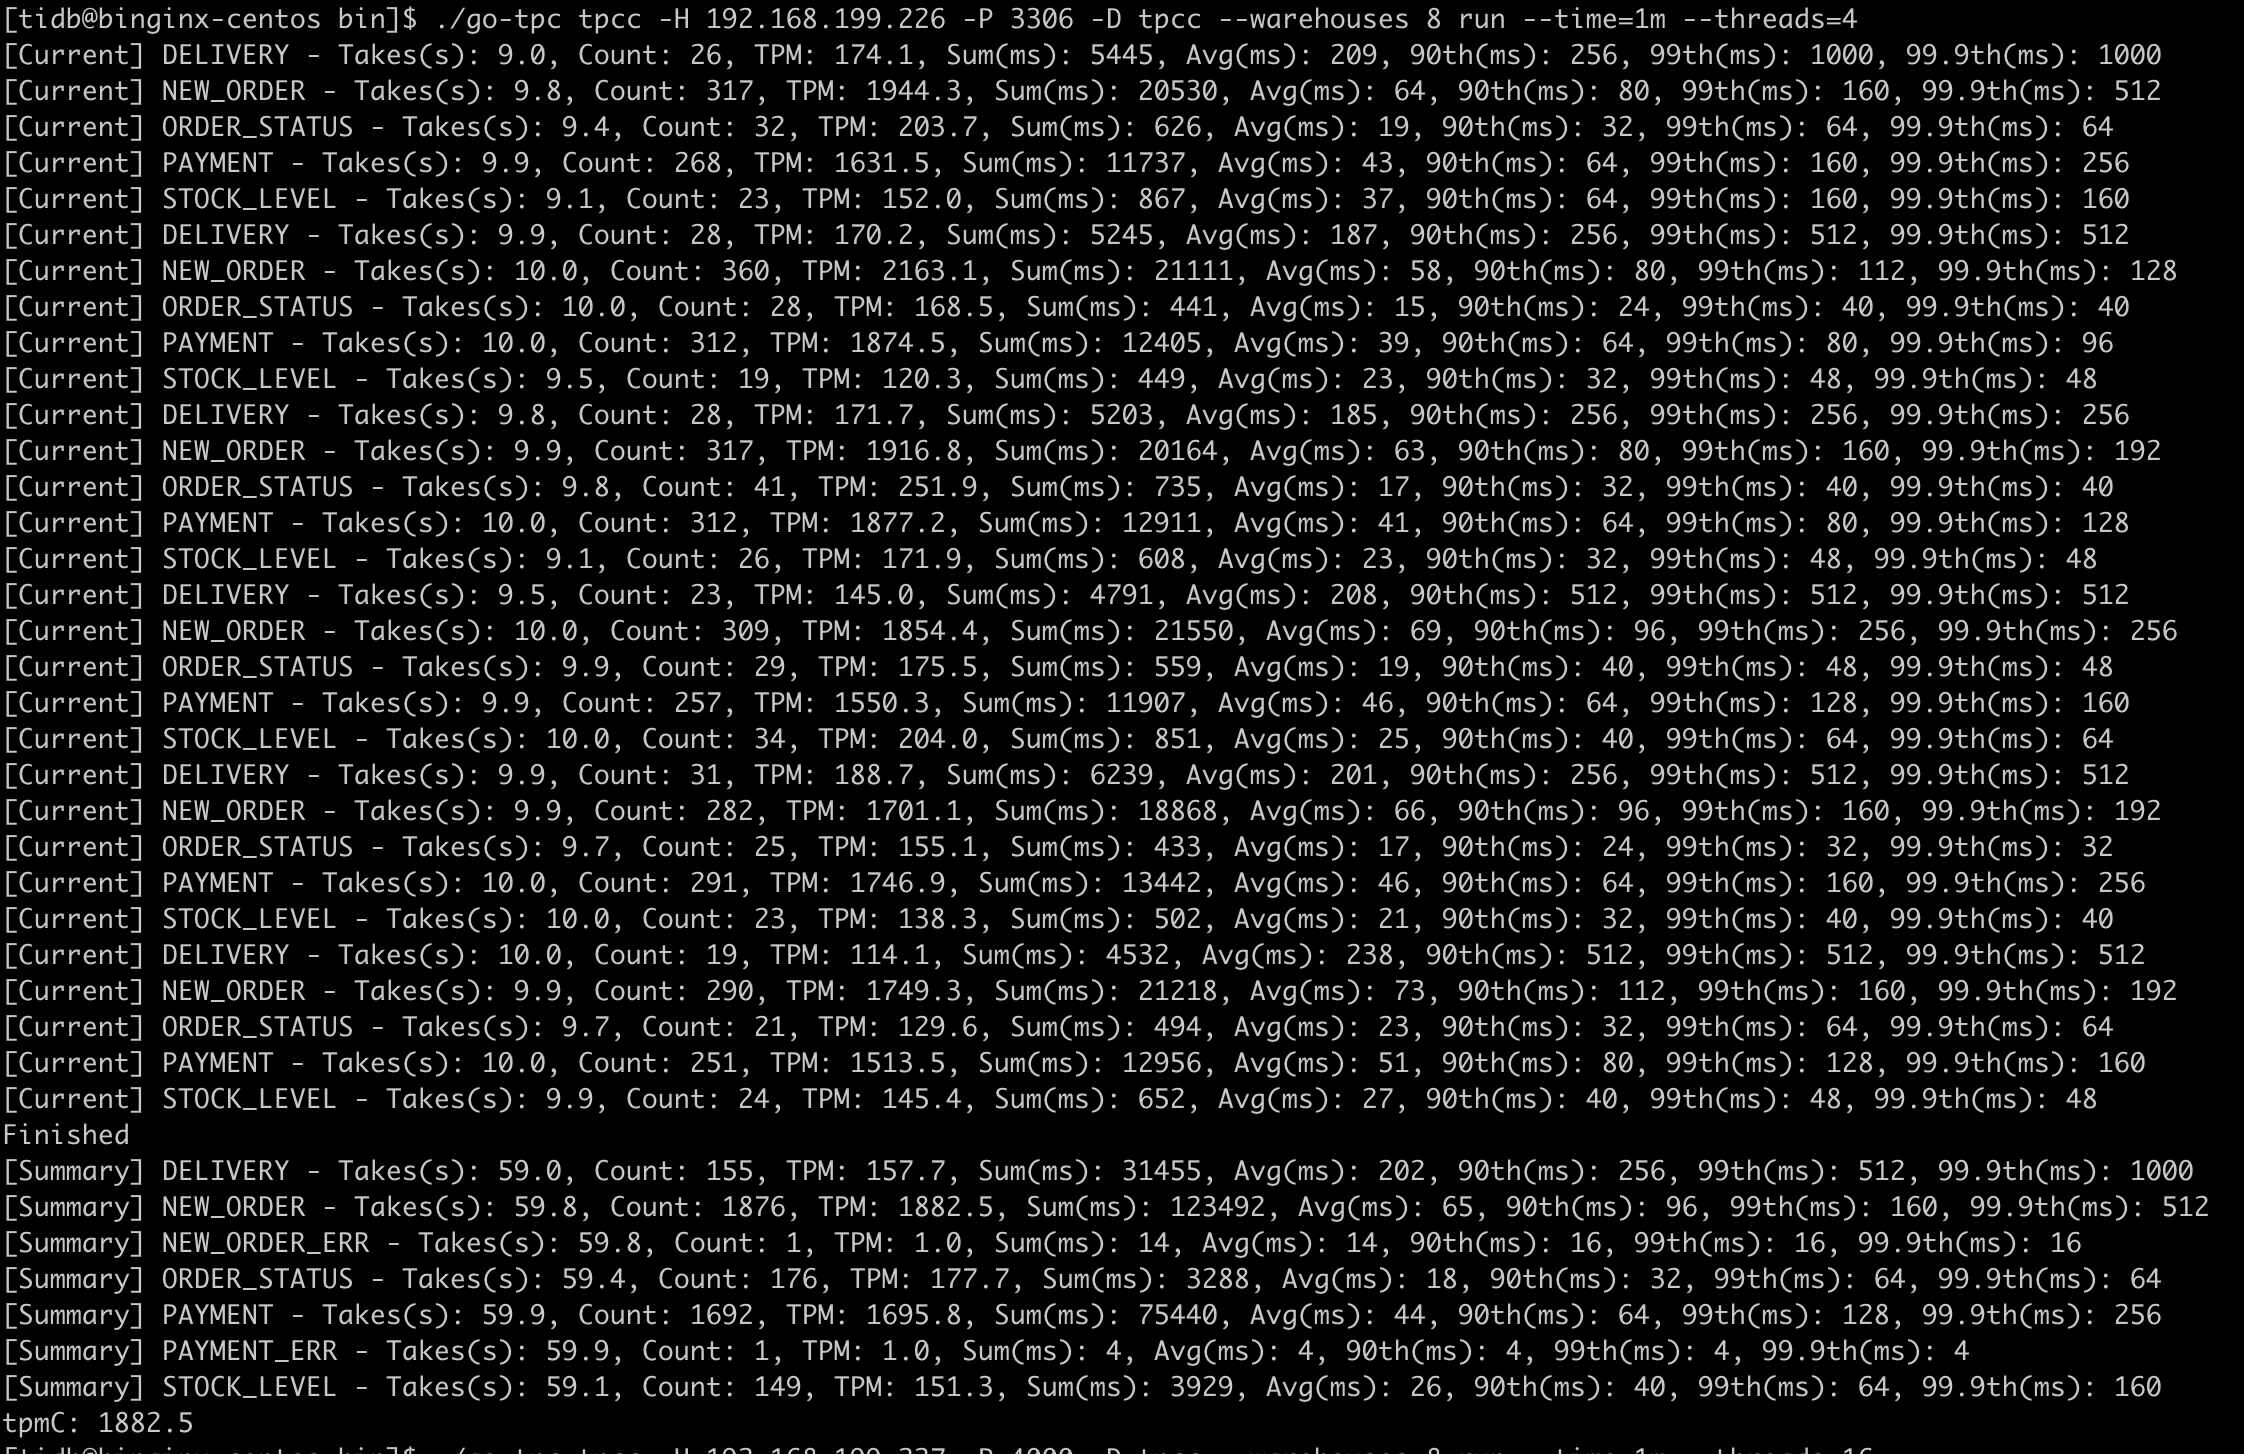
测试数据
1
2
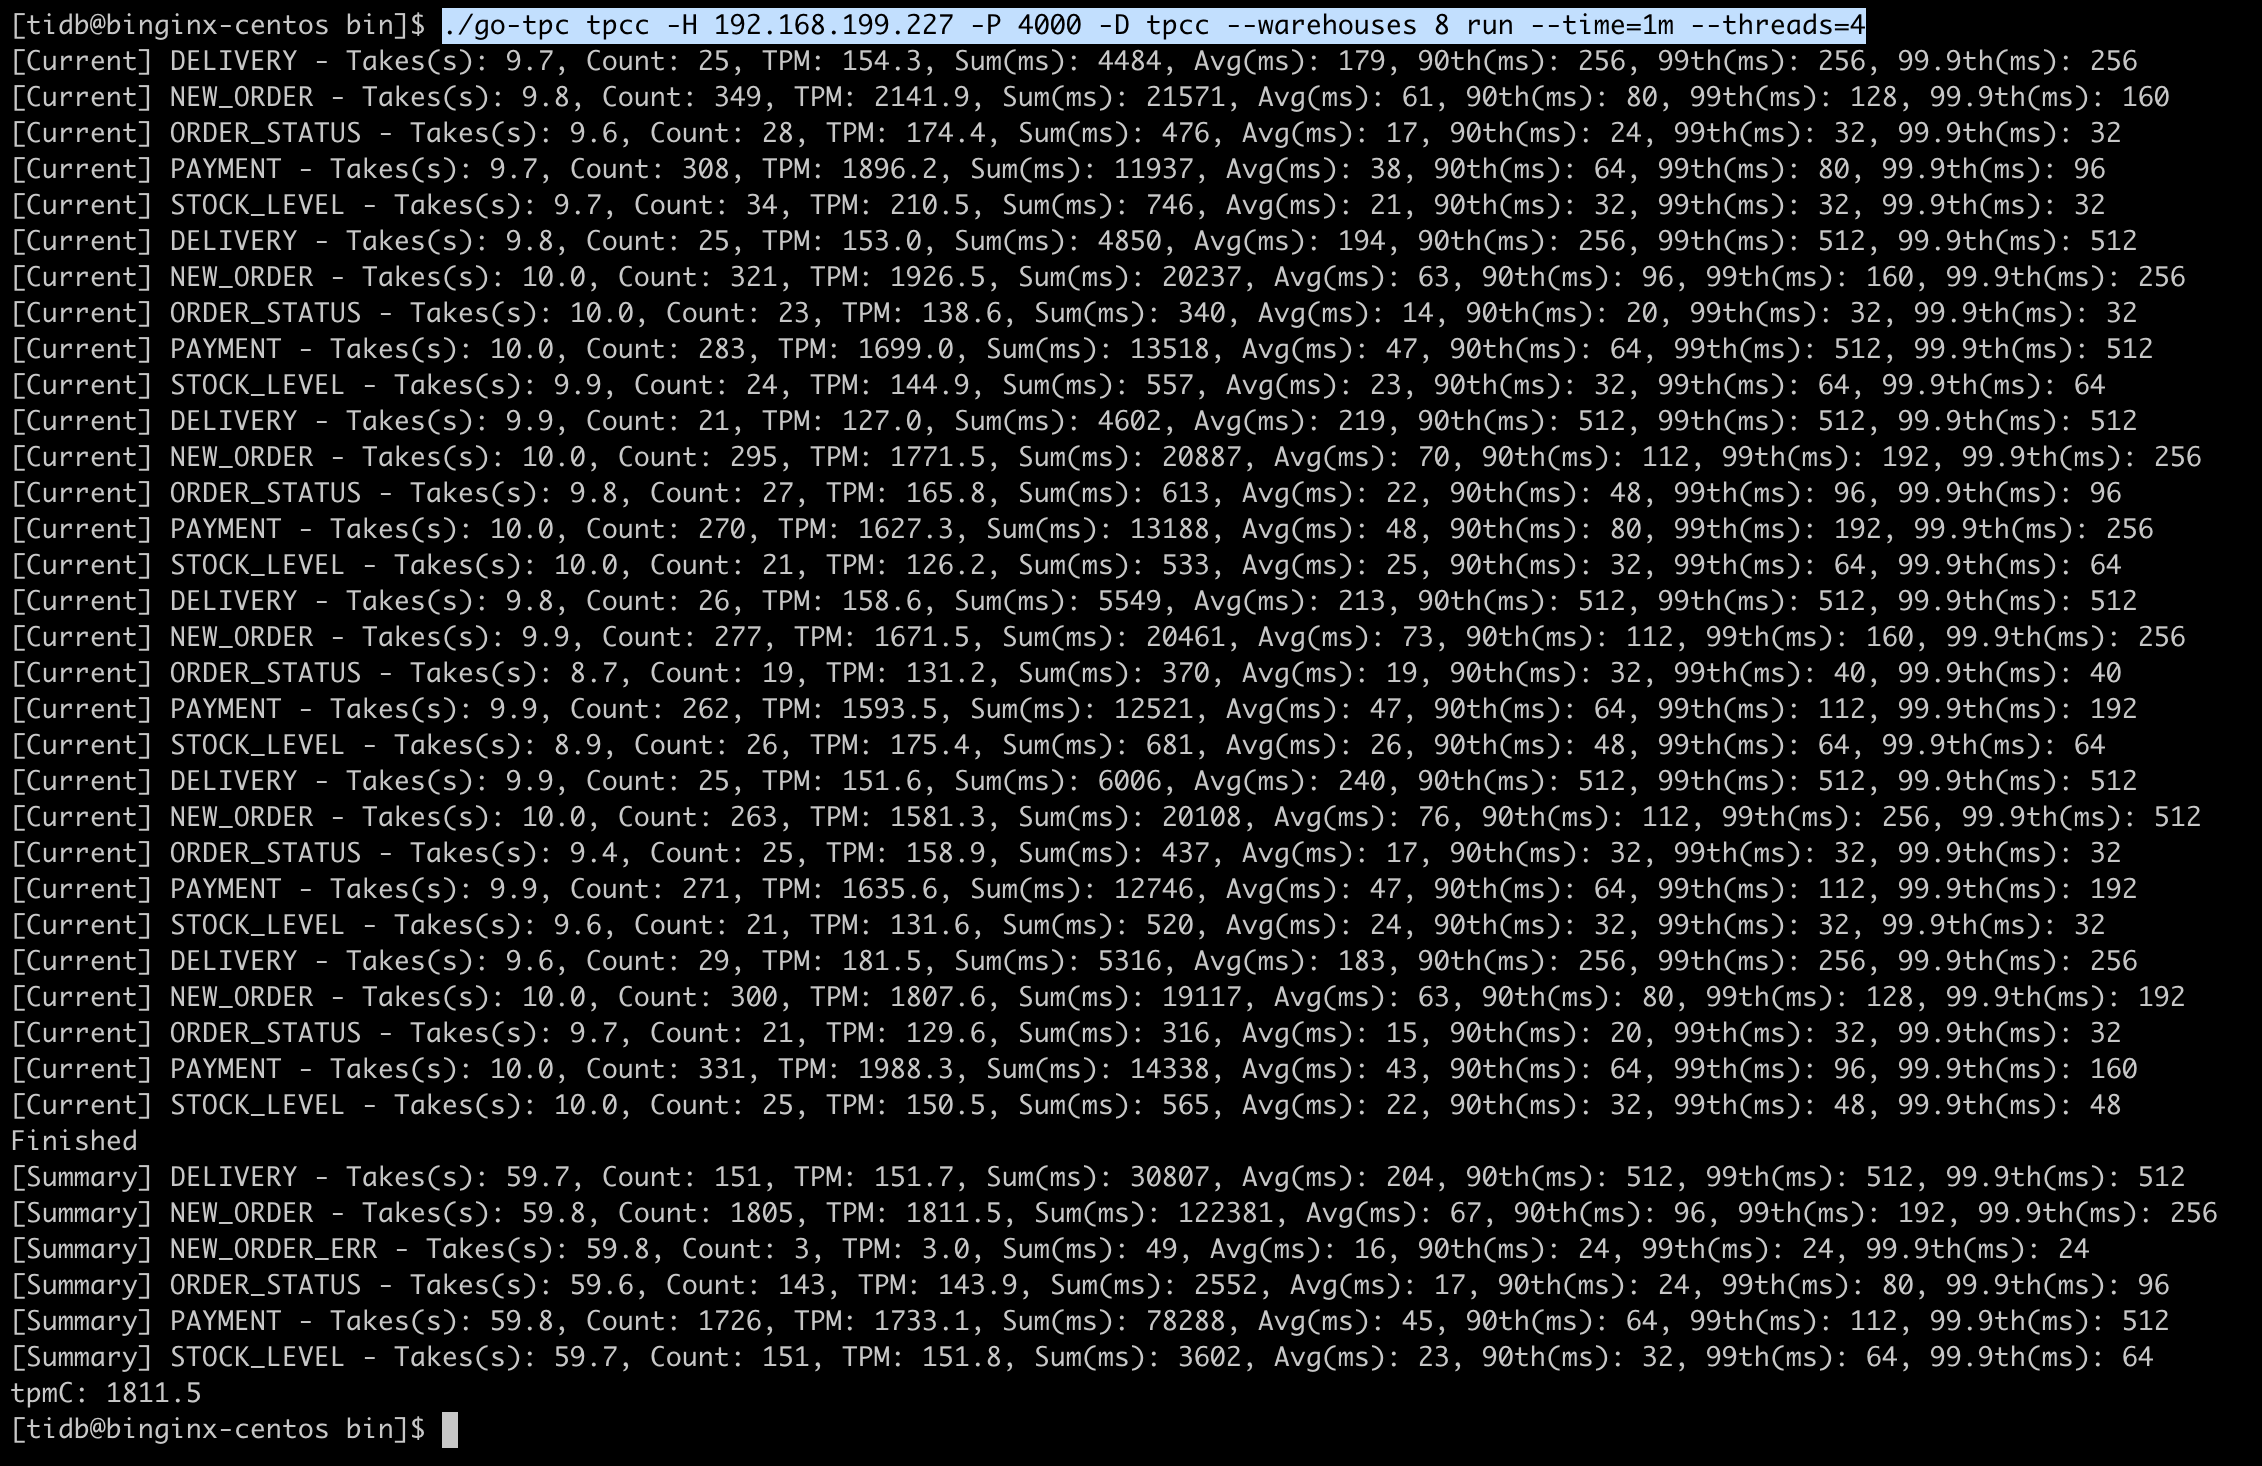
| ## threads=4
./go-tpc tpcc -H 192.168.199.227 -P 4000 -D tpcc --warehouses 8 run --time=1m --threads=4
|
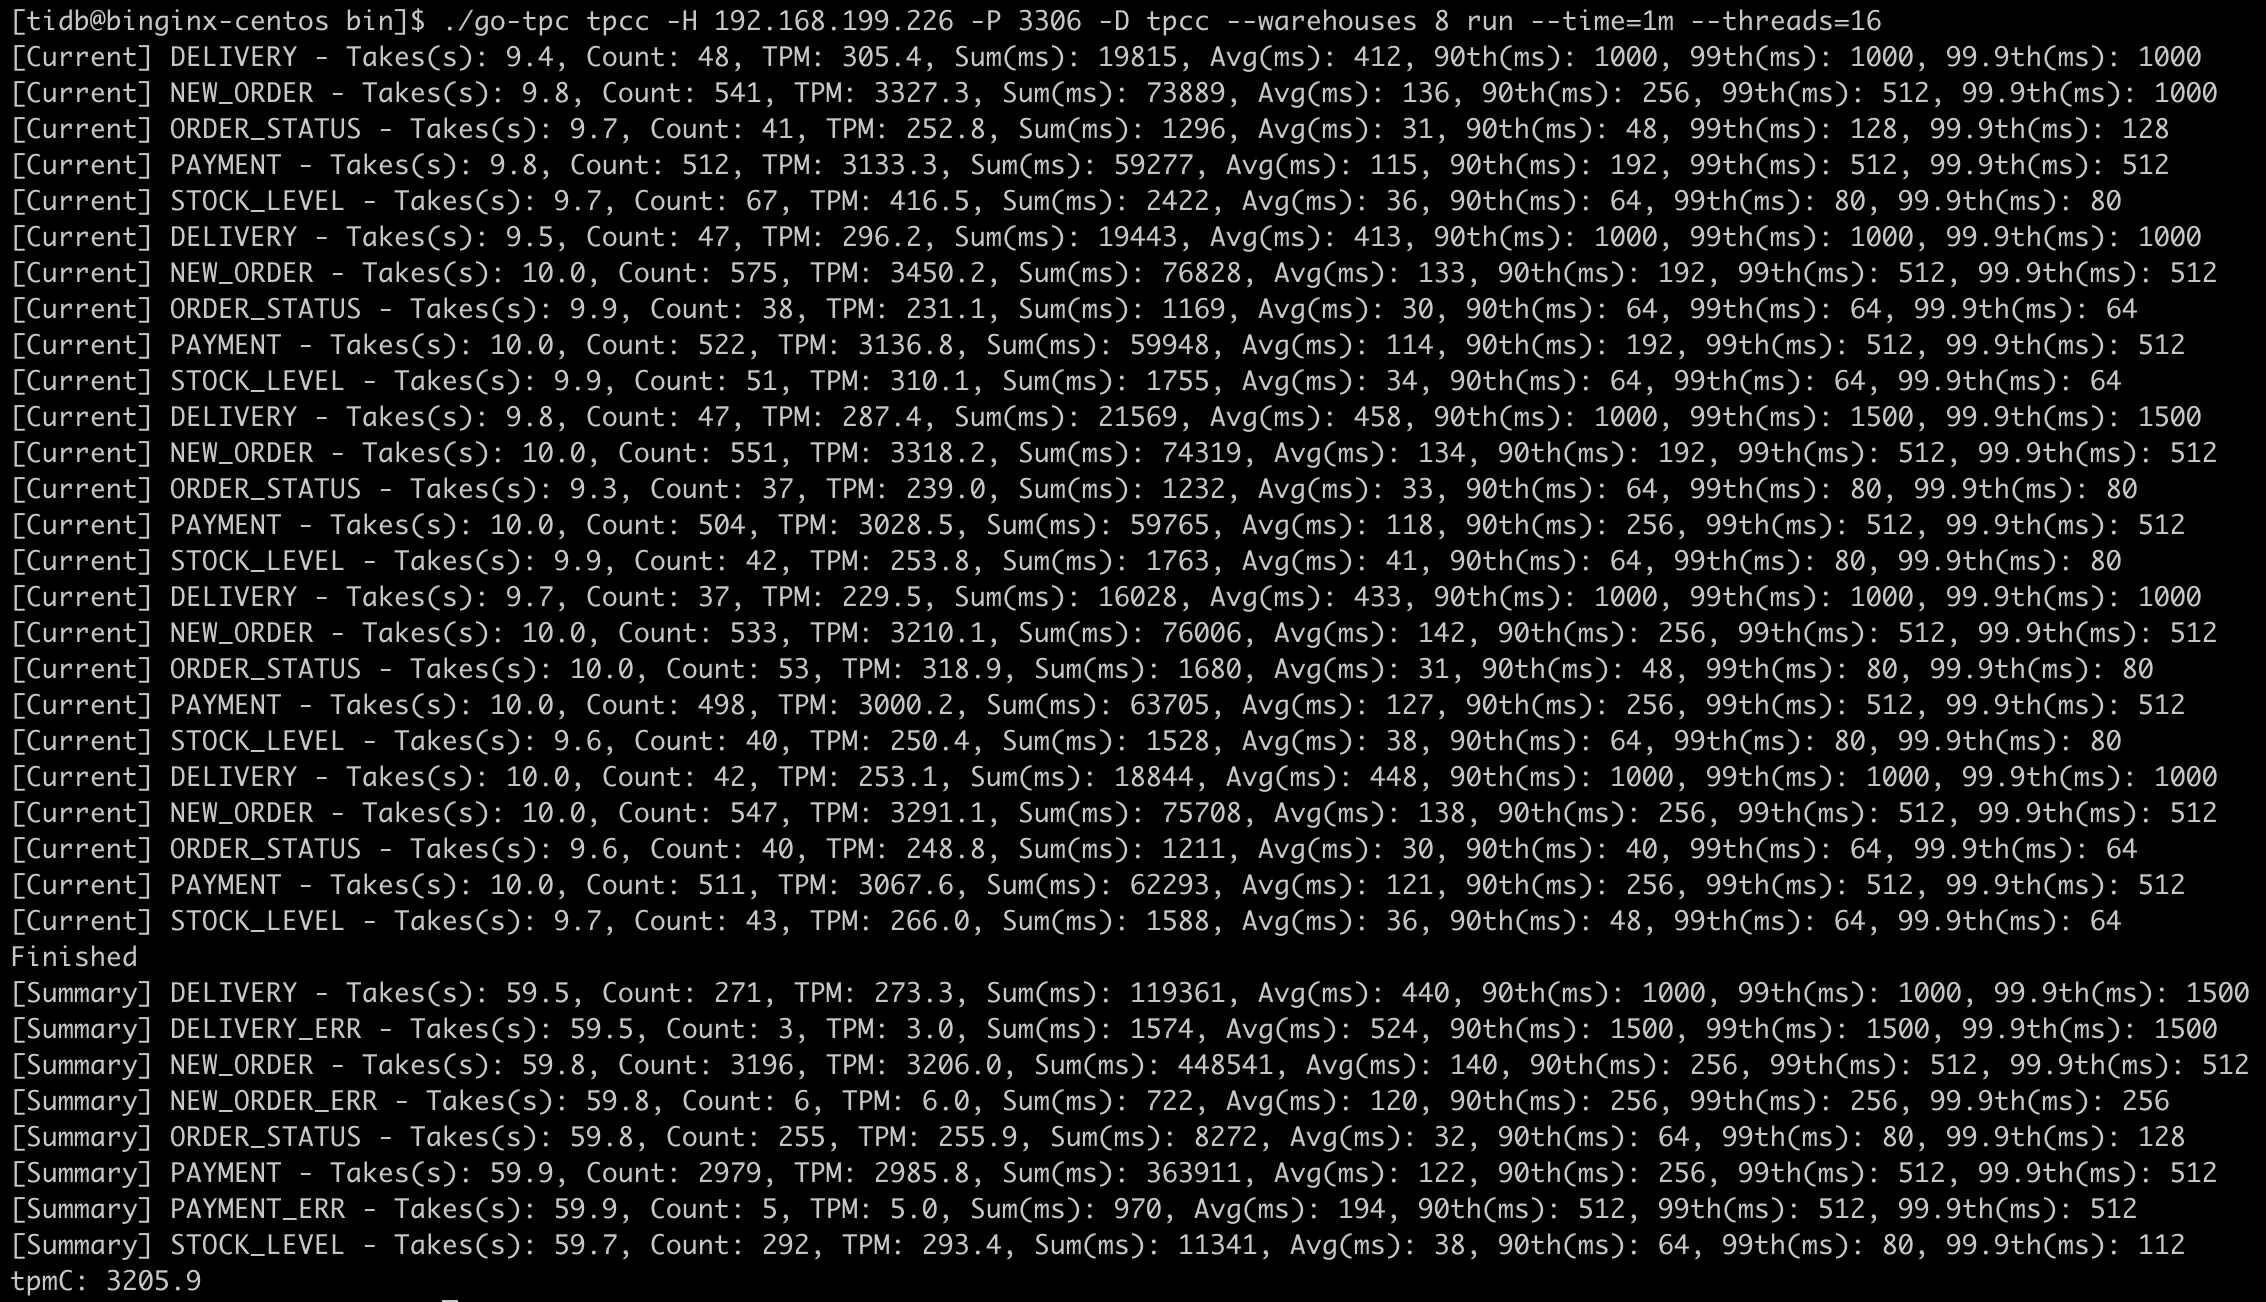
1
2
| ## threads=16
./go-tpc tpcc -H 192.168.199.227 -P 4000 -D tpcc --warehouses 8 run --time=1m --threads=16
|
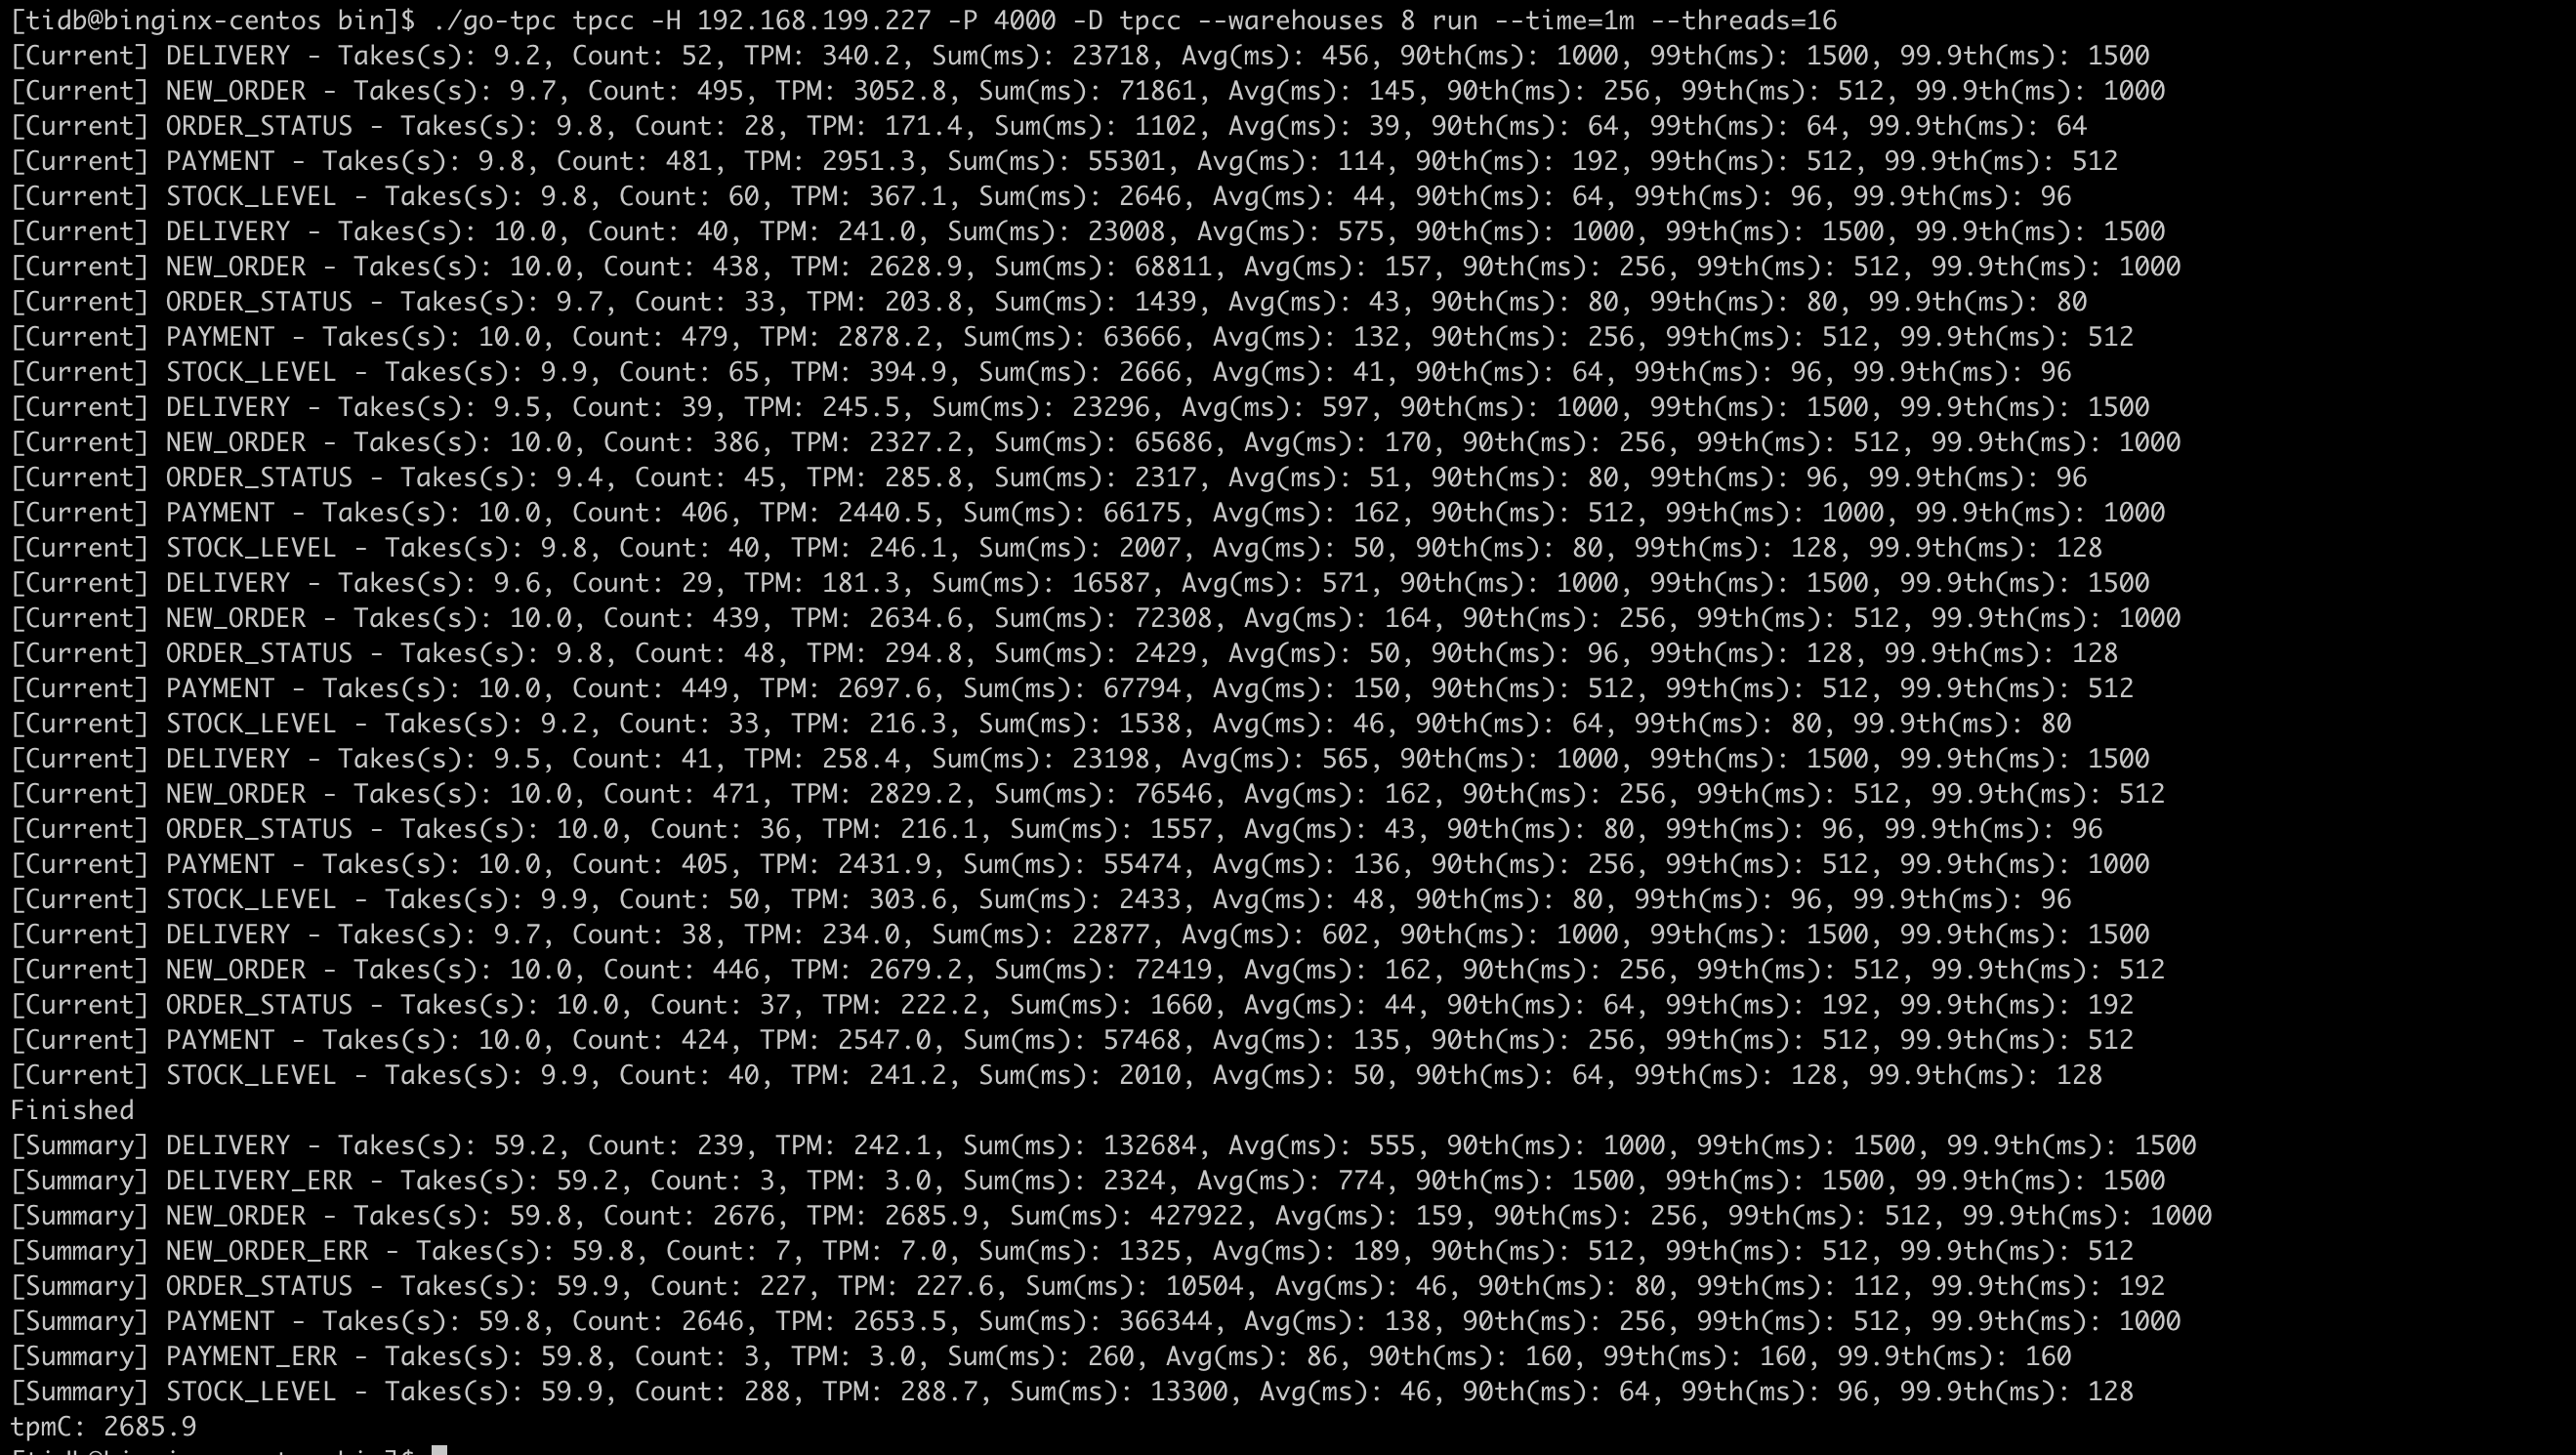
线程数增加到16后,tpmc有了将近1.5倍的提升
1
2
| ## threads=64
./go-tpc tpcc -H 192.168.199.227 -P 4000 -D tpcc --warehouses 8 run --time=1m --threads=64
|
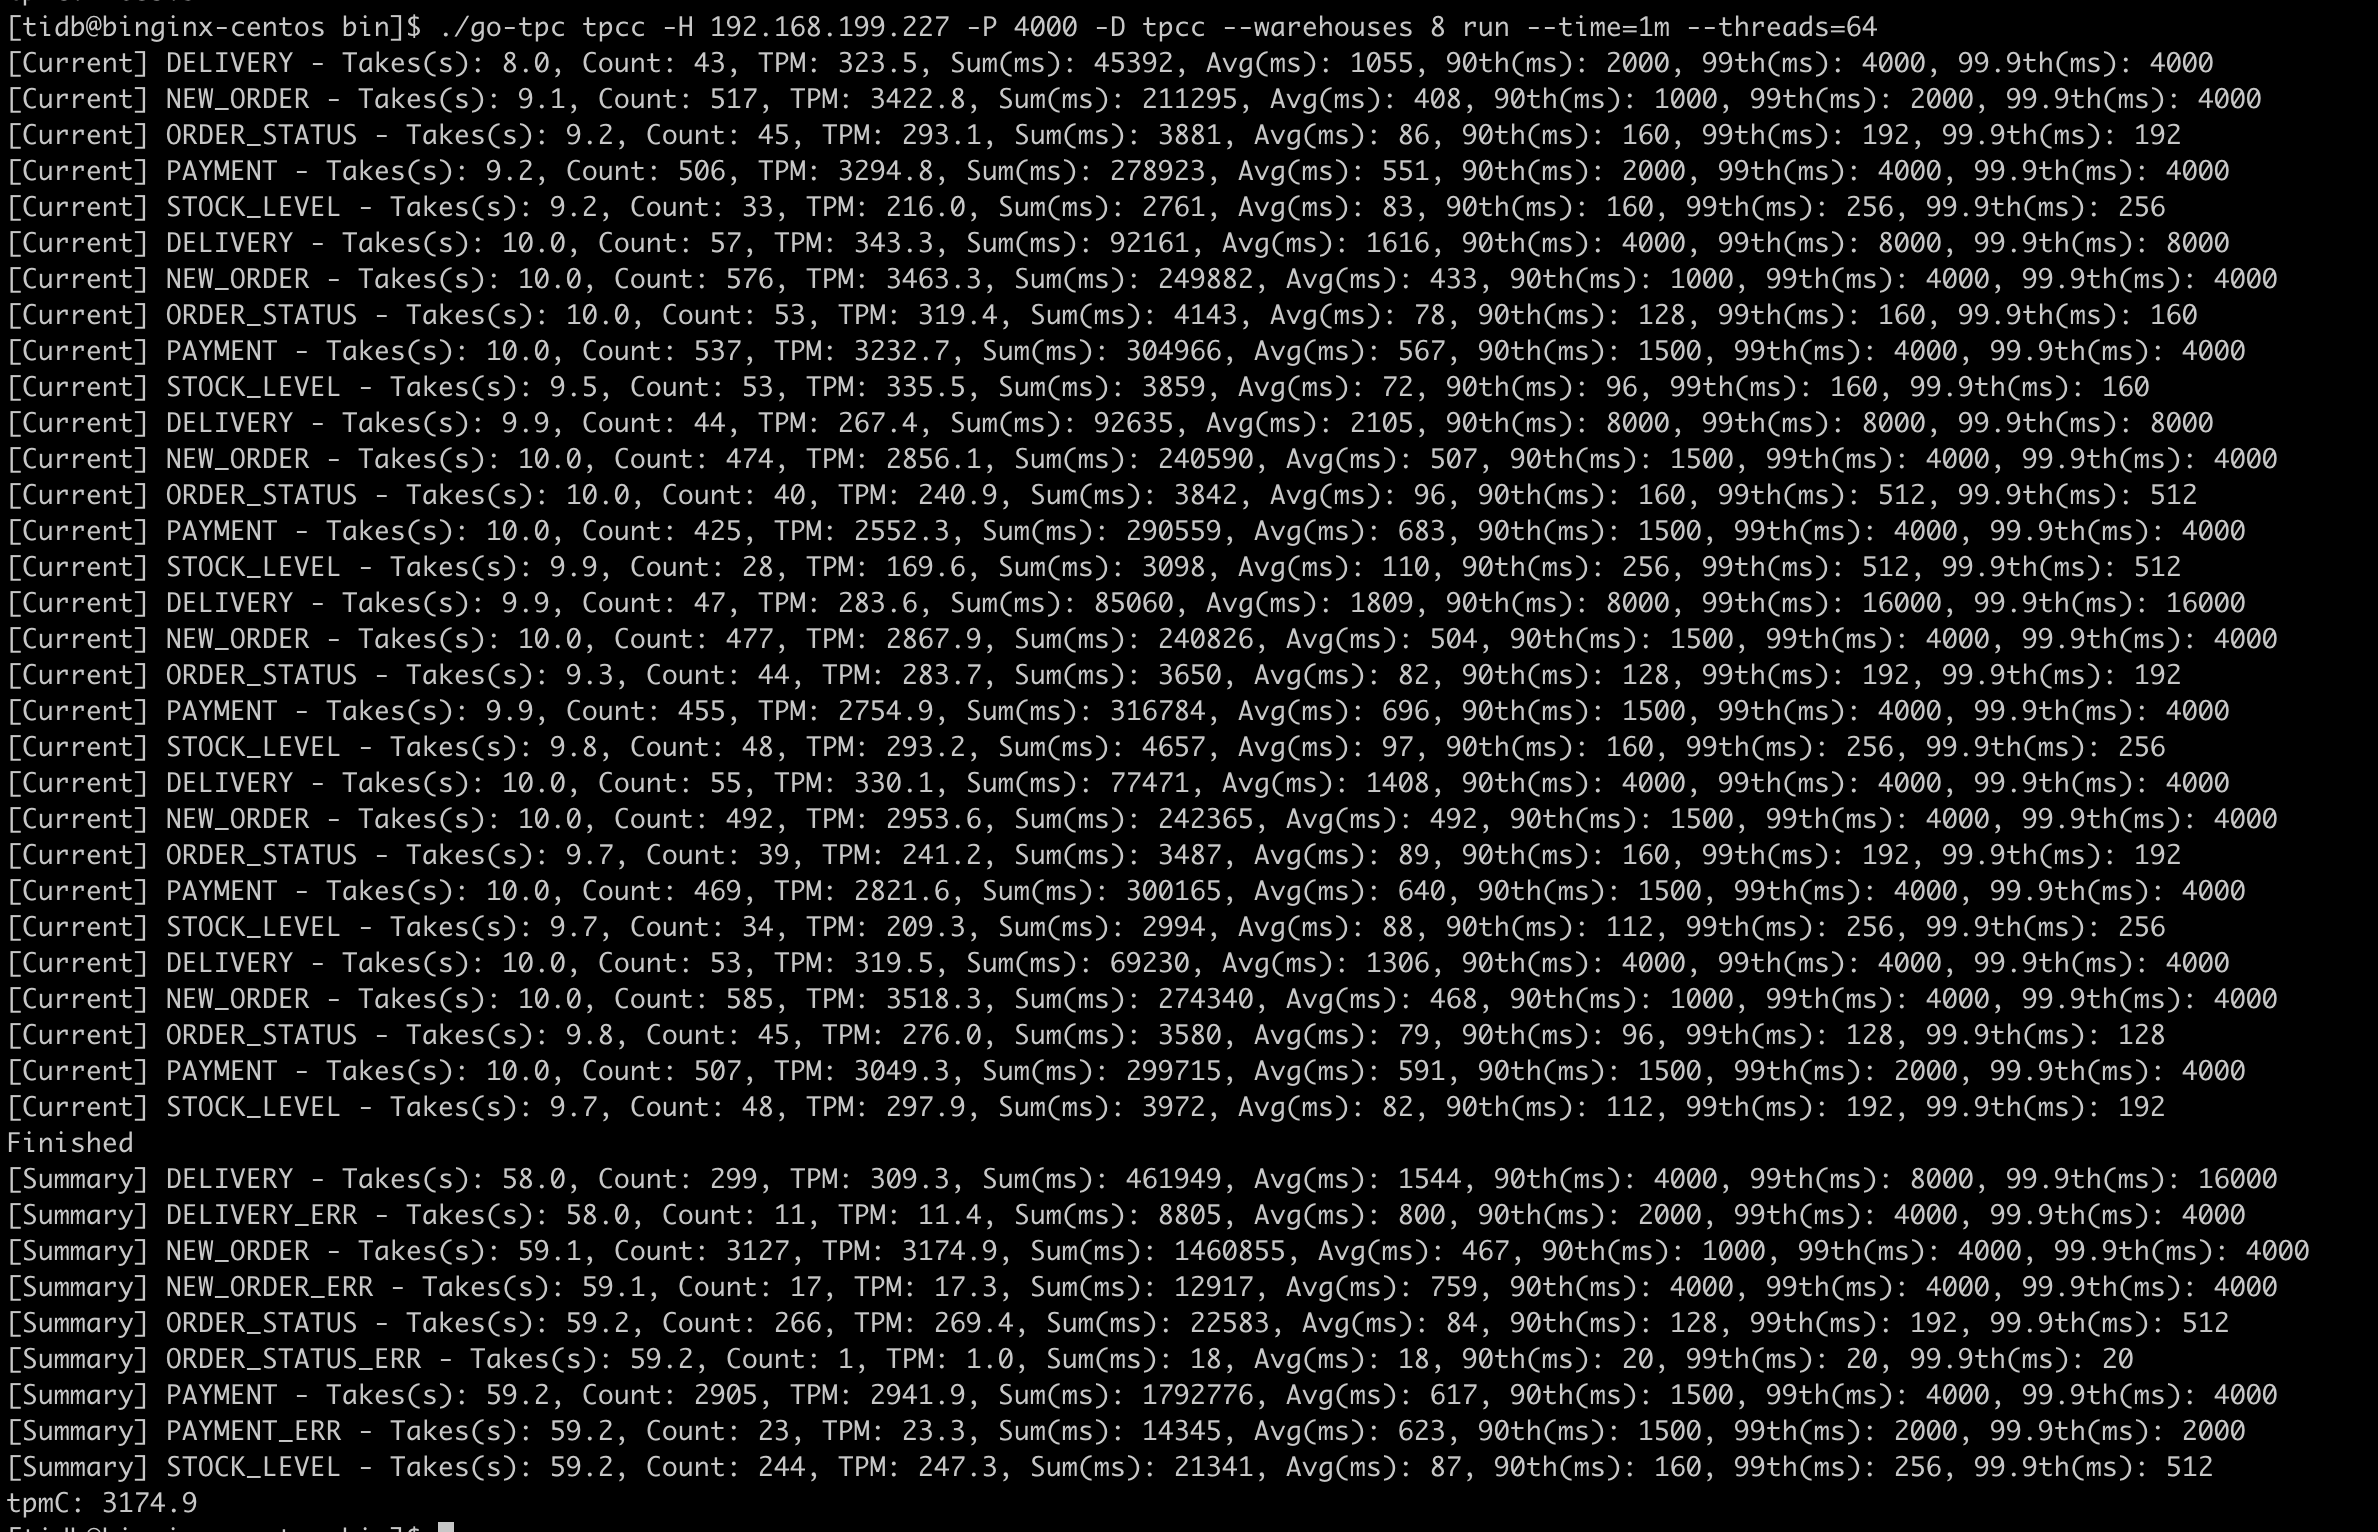
线程数增加到64后,tpmc的提升不是很大
使用go-ycsb测试
安装go-ycsb
1
2
3
| git clone https://github.com/pingcap/go-ycsb.git
cd go-ycsb
make
|
准备数据
1
| ./bin/go-ycsb load mysql -P workloads/workloada -p recordcount=10000 -p mysql.host=192.168.199.227 -p mysql.port=4000 --threads 16
|
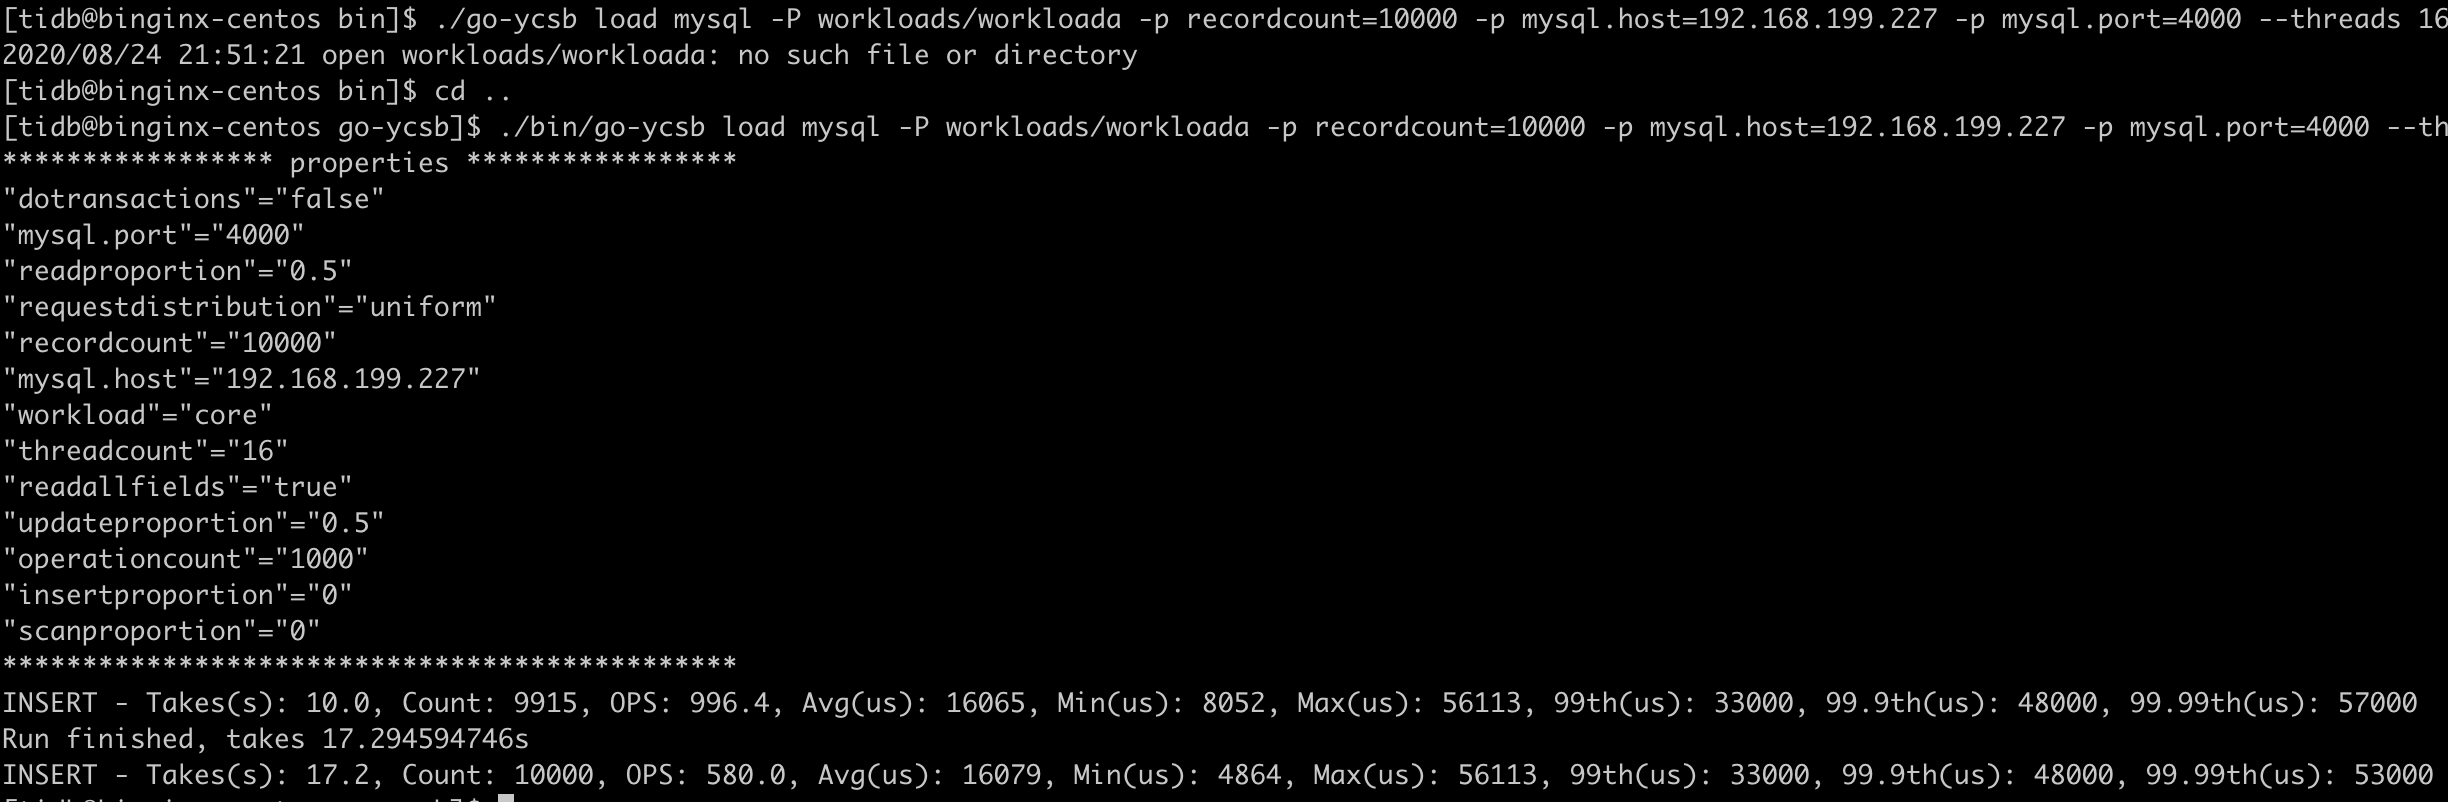
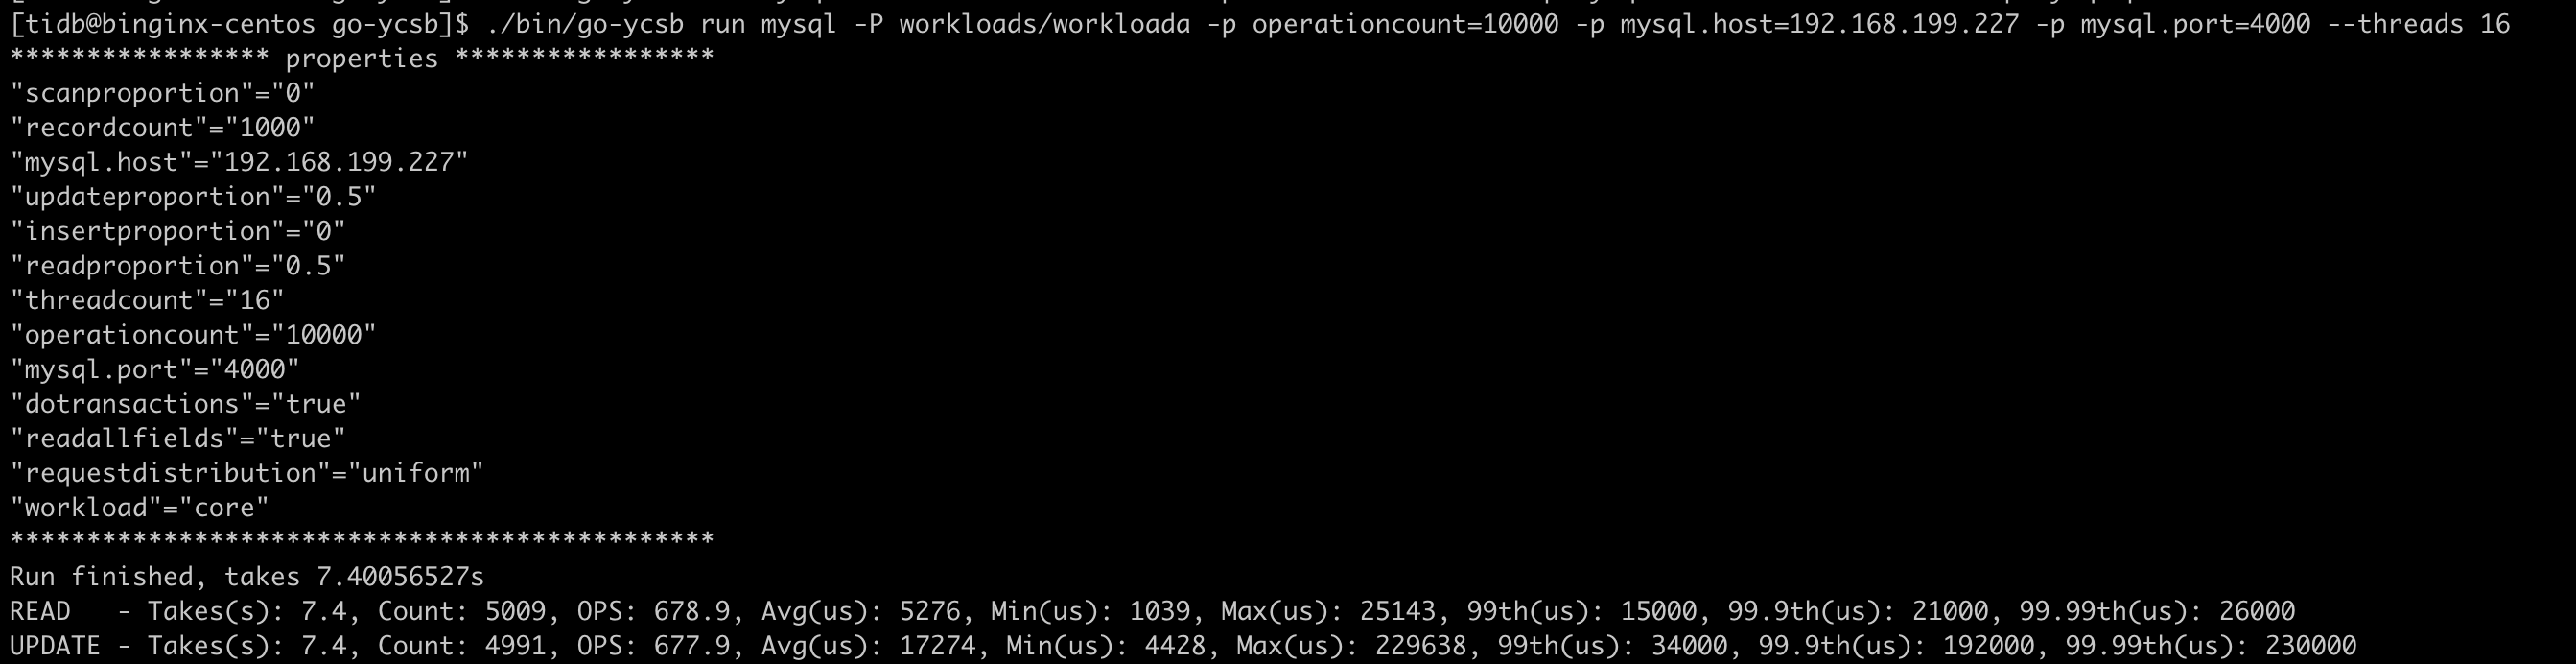
测试数据
1
| ./bin/go-ycsb run mysql -P workloads/workloada -p operationcount=10000 -p mysql.host=192.168.199.227 -p mysql.port=4000 --threads 16
|
调优测试
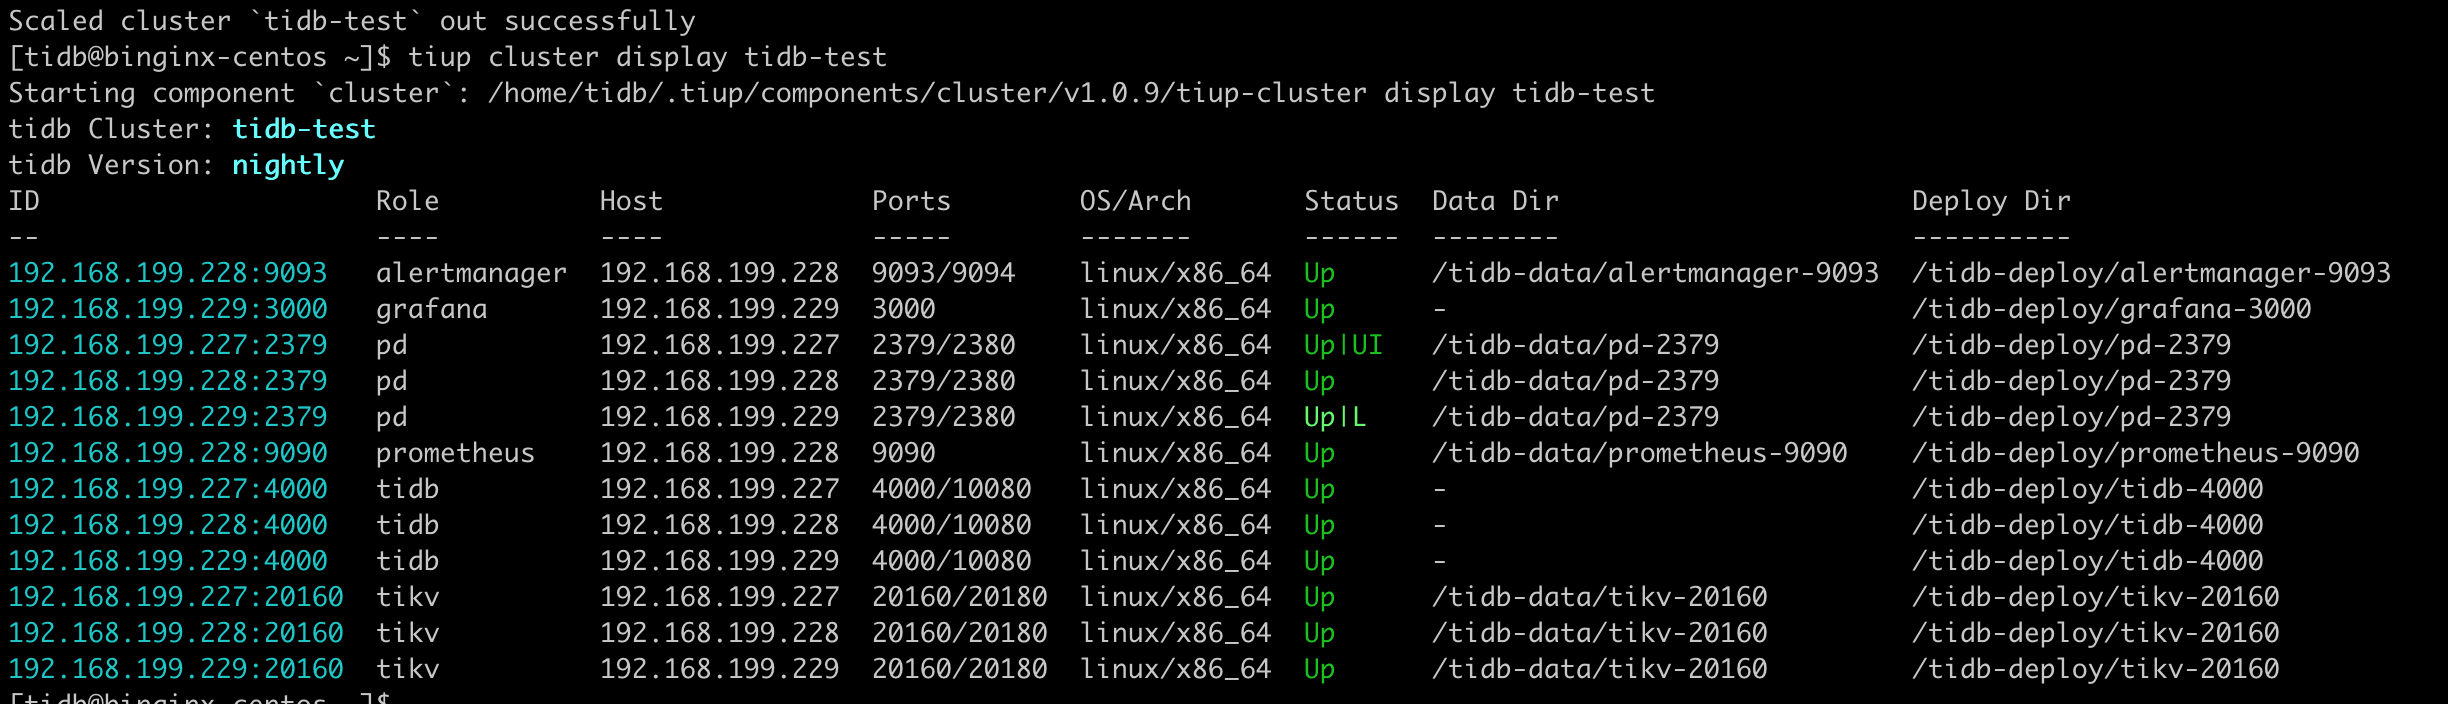
扩容tidb,使用haproxy负载
扩容tidb
1
2
3
4
5
6
| vim scale.yaml
## tidb_servers:
## - host: 192.168.199.228
## - host: 192.168.199.229
!wq
tiup cluster scale-out tidb-test scale.yaml
|
安装配置haproxy
1
2
3
4
5
6
7
8
9
10
11
12
13
14
15
16
17
18
19
20
21
22
23
24
25
26
27
28
29
30
31
| su - root
yum install -y haproxy
haproxy -v
vim /etc/haproxy/haproxy.cfg
## 数据库负载均衡
## listen proxy-mysql
## bind 0.0.0.0:3306
## mode tcp
## balance roundrobin
## option tcplog
## server MySQL_1 192.168.199.227:4000 maxconn 1000
## server MySQL_2 192.168.199.228:4000 maxconn 1000
## server MySQL_3 192.168.199.229:4000 maxconn 1000
!wq
## 配置rsyslog,用于记录haproxy日志
cd /var/log
mkdir haproxy
cd haproxy
touch haproxy.log
chmod a+w haproxy.log
vim /etc/rsyslog.cnf --修改rsyslog.cfg文件
$ModLoad imudp
$UDPServerRun 514 ---将这两行前的#去掉。
## 在local7.* /var/log/boot.log之后添加如下内容
# Save haproxy log
local2.* /var/log/haproxy/haproxy.log
vim /etc/sysconfig/rsyslog --修改rsylog文件
SYSLOGD_OPTIONS="" 改为 SYSLOGD_OPTIONS="-r -m 2 -c 2"
## 重启rsyslog于haproxy
systemctl restart rsyslog
systemctl restart haproxy
|
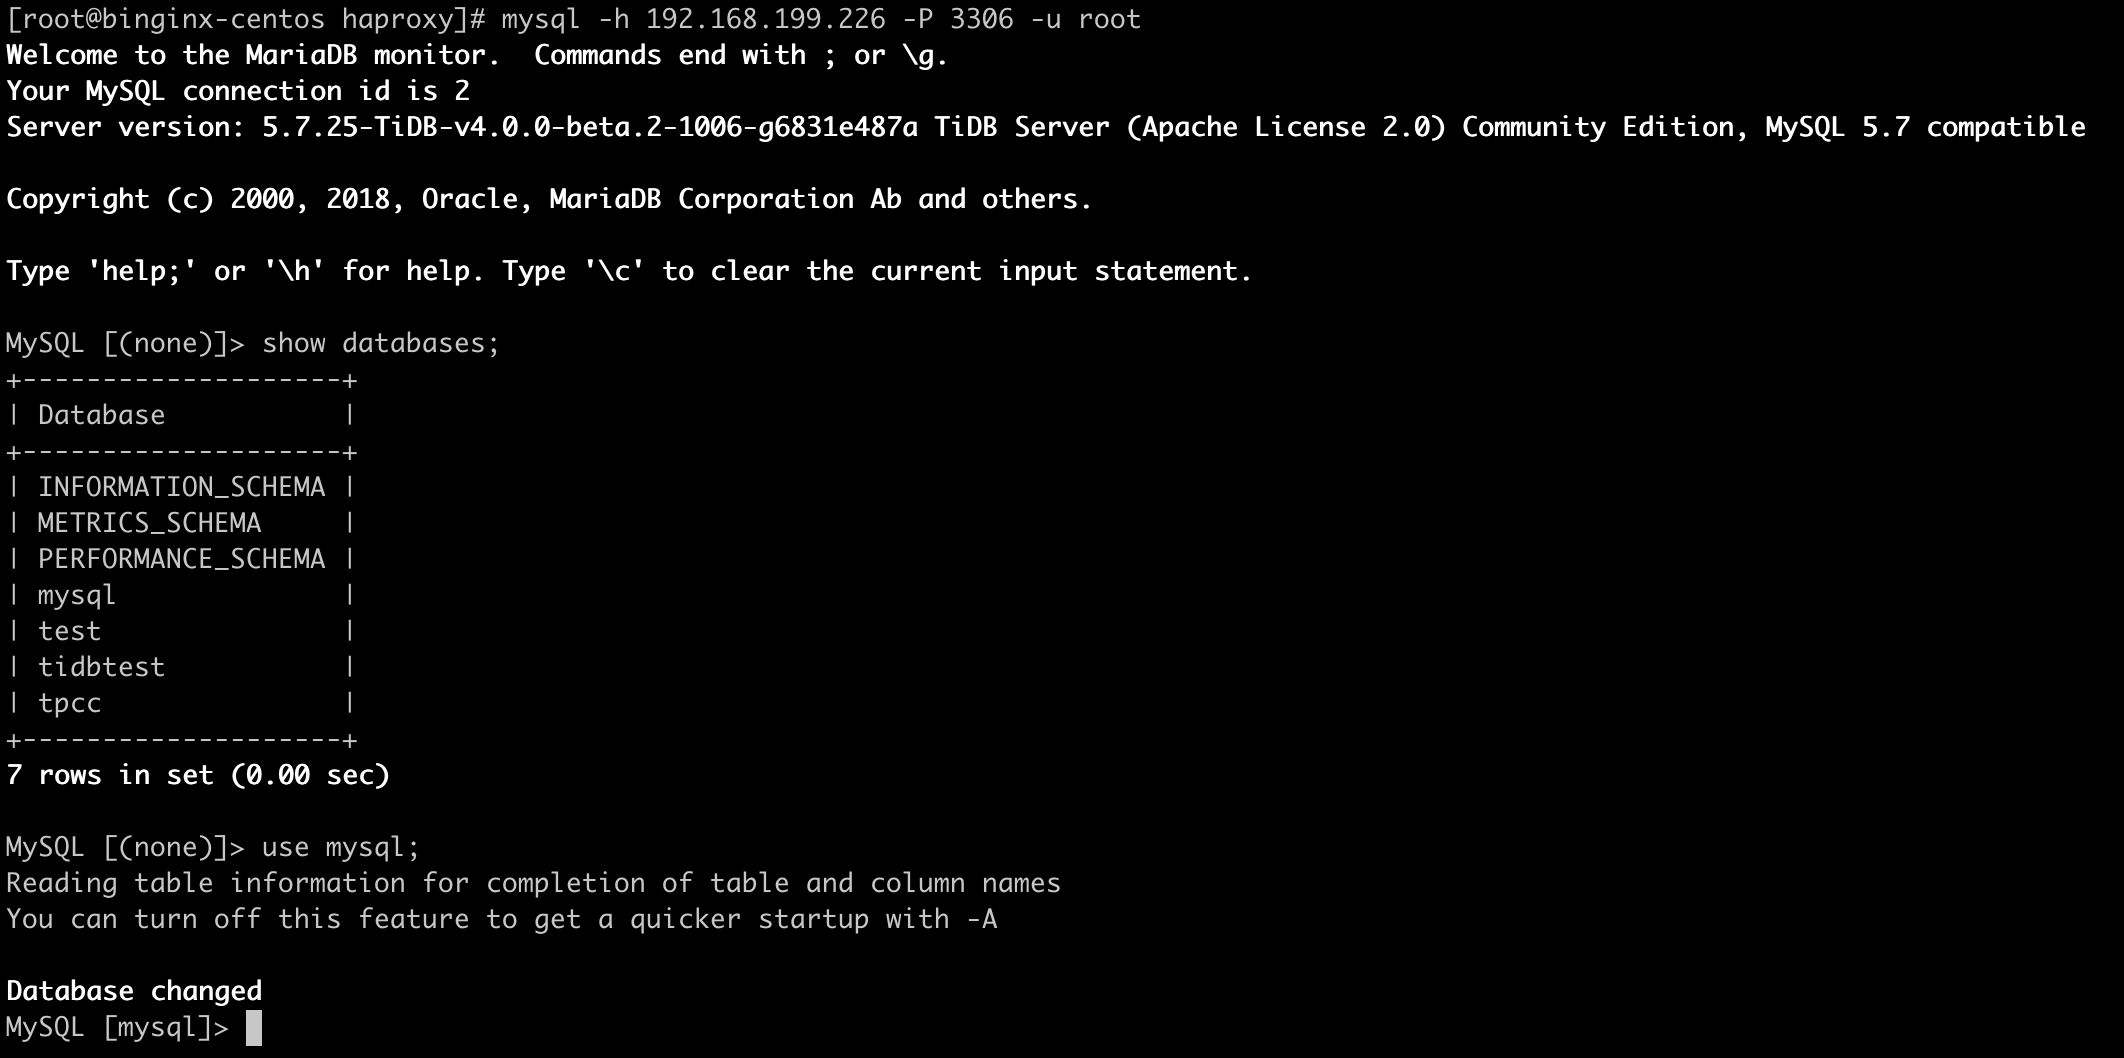
使用go-tpc测试
1
2
| ## threads=4
./go-tpc tpcc -H 192.168.199.226 -P 3306 -D tpcc --warehouses 8 run --time=1m --threads=4
|
1
2
| threads=64
./go-tpc tpcc -H 192.168.199.226 -P 3306 -D tpcc --warehouses 8 run --time=1m --threads=64
|
tidb三台负载后,tpmc有了提升,但是提升不大
使用sysbench测试
1
2
| ## threads=64
sysbench --config-file=sysbench-ha.cfg oltp_point_select --threads=64 --tables=32 --table-size=10000 run
|
1
2
| ## threads=64
sysbench --config-file=sysbench-ha.cfg oltp_update_index --threads=64 --tables=32 --table-size=10000 run
|
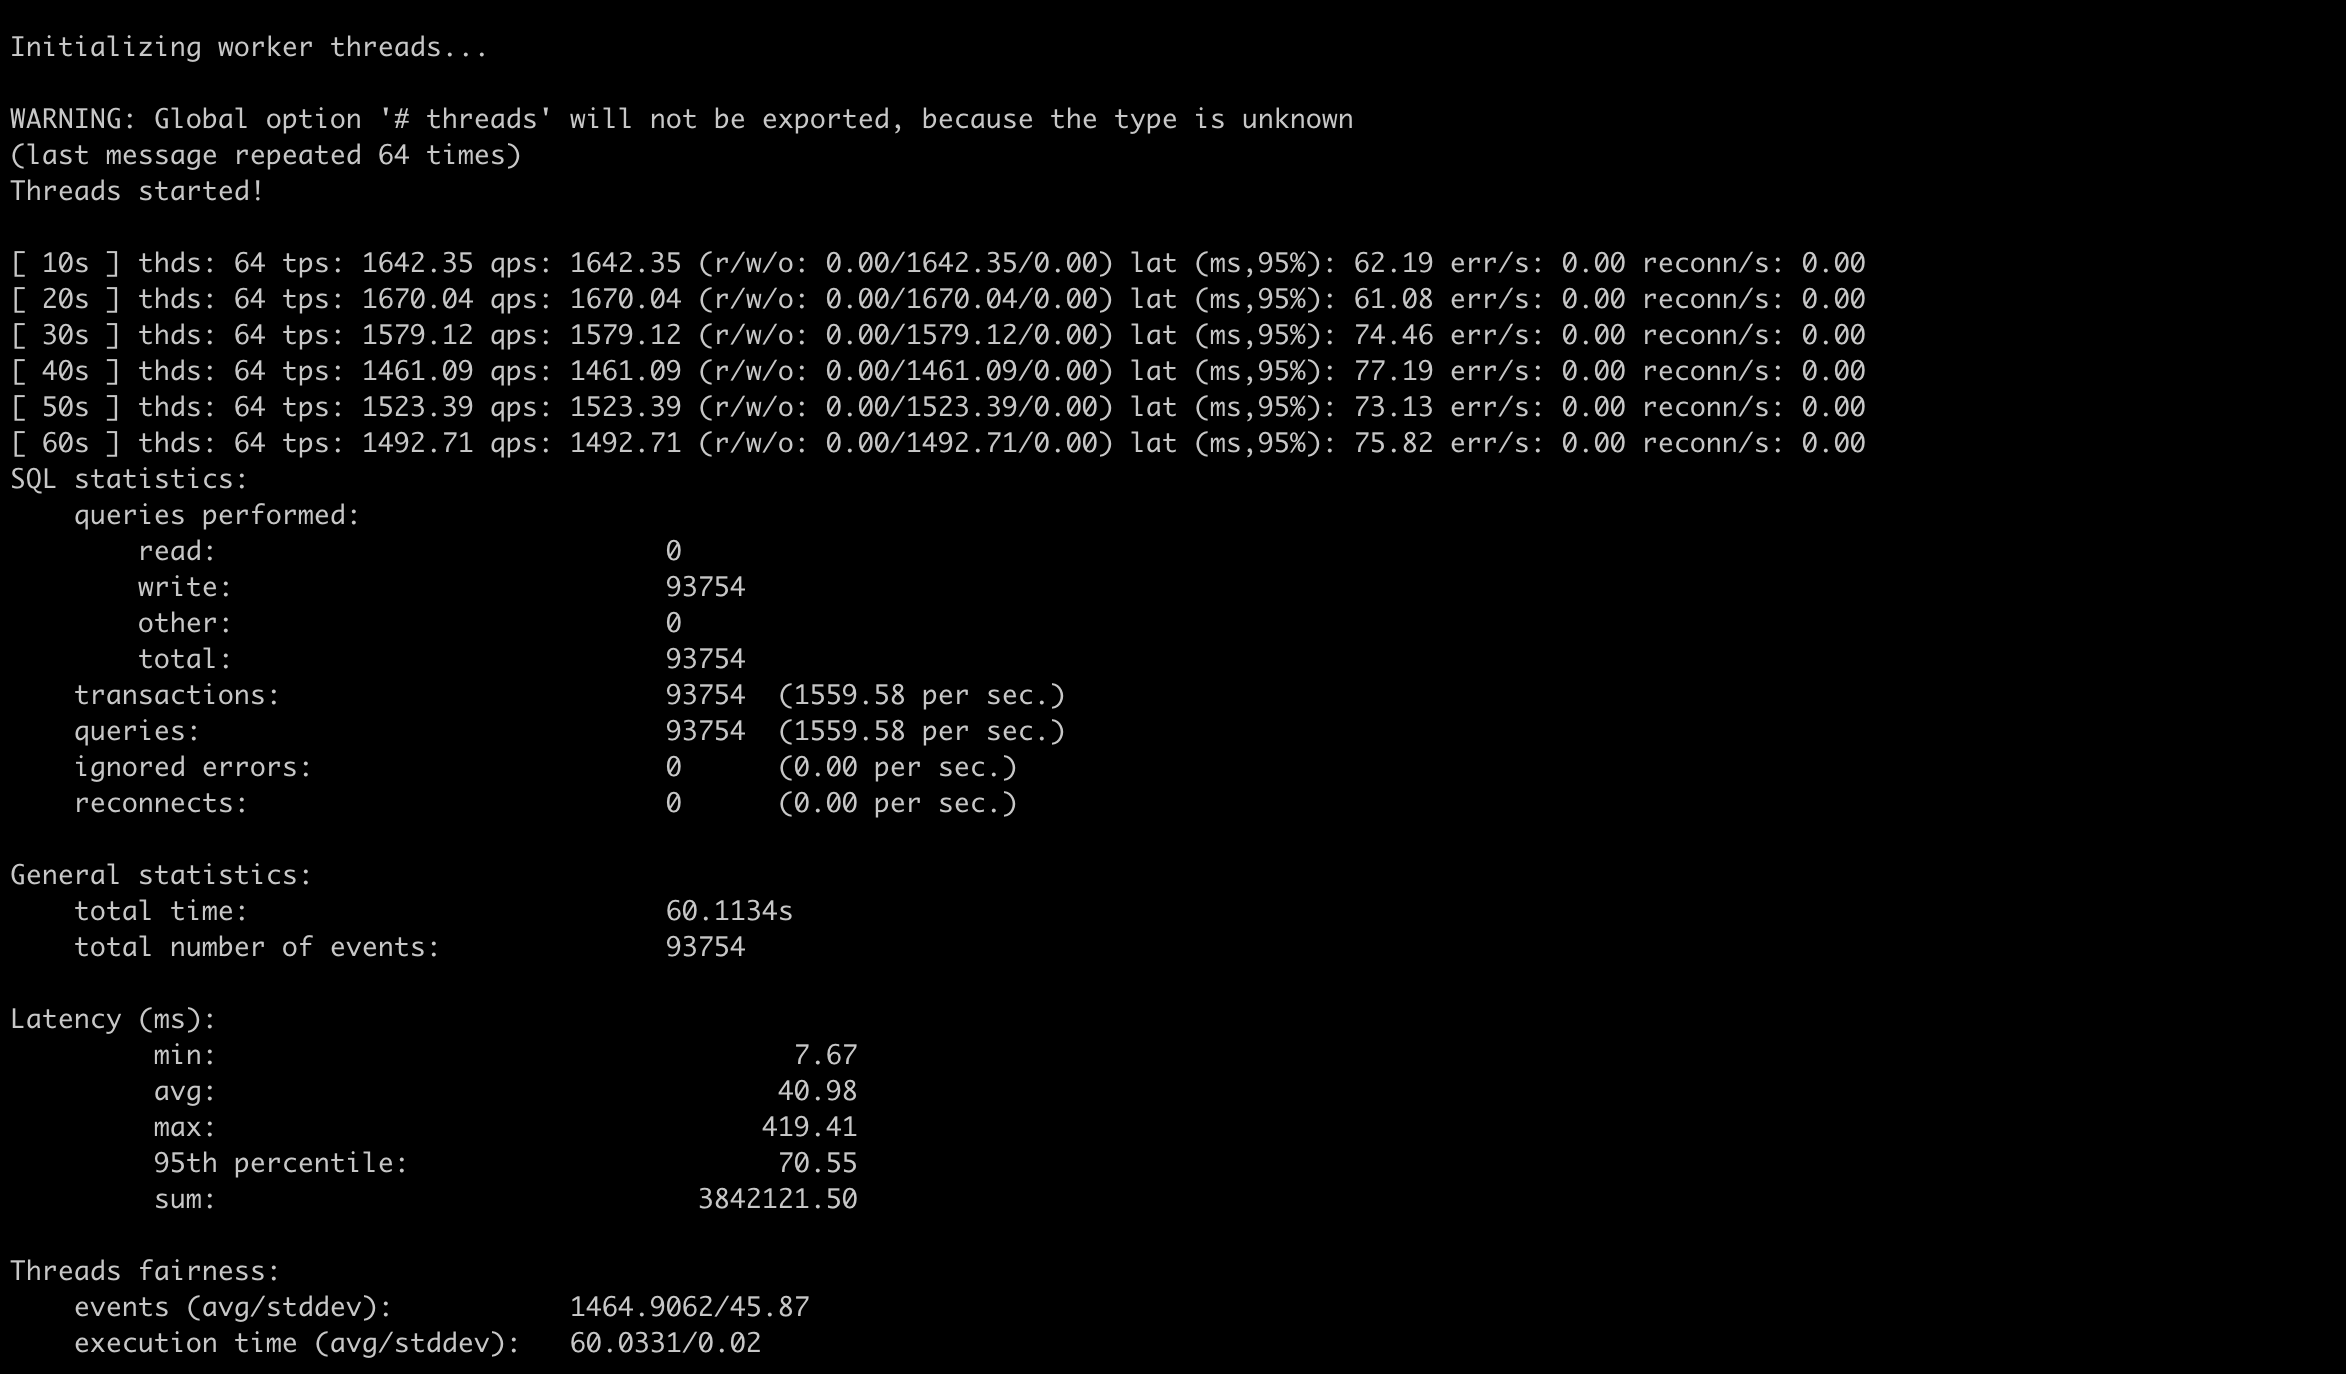
tidb三台负载后,使用sysbench的读写测试都有了一定程度的提升,但是提升不明显
时间原因,tidb、tikv参数的调优没有去做
总结
- 本次实验使用的最小拓扑结构,机器资源有限,数据集较小,使用多台tidb进行负载会提升一定的读写效率
- tidb、tikv、pd的相关参数不是很熟悉,个人认为在tidb内部影响性能的模块可能会是sql解析层以及与tikv交互的事务处理阶段
prev
last update time 2020-08-24
next